The below post may contain affiliate links. This means we will receive a commission if you purchase through our link, with no extra cost to you. As an Amazon Associate we earn from qualifying purchases. Read our full disclaimer.
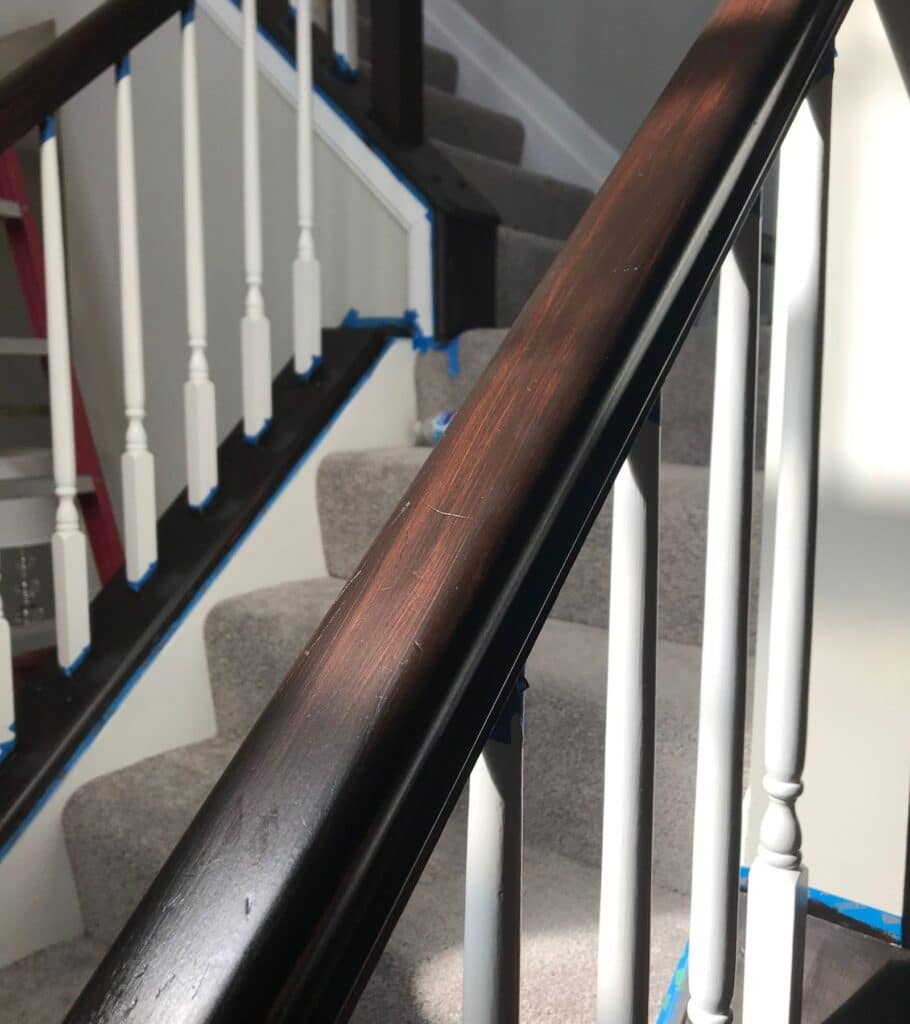
Today I’ll cover exactly how I completed my java gel stain banister transformation so you can too!
One of the first things you see when walking into a home is the staircase. It’s the focal point of any foyer or entryway. And oak banisters are the biggest offenders for holding back your entryway from its full potential.
This project might seem like a daunting task, but if you have an empty weekend, this is actually a really easy one to take on!
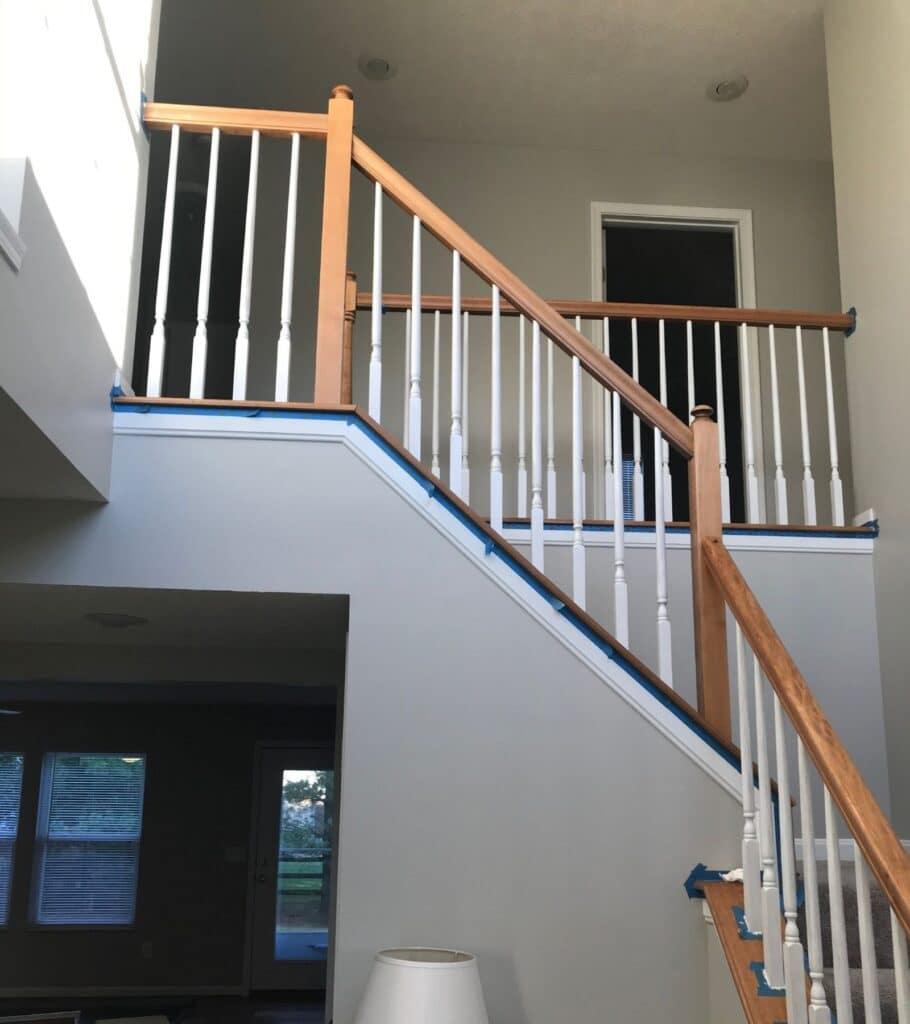
Here’s my very own java gel stain staircase before and after for motivation!
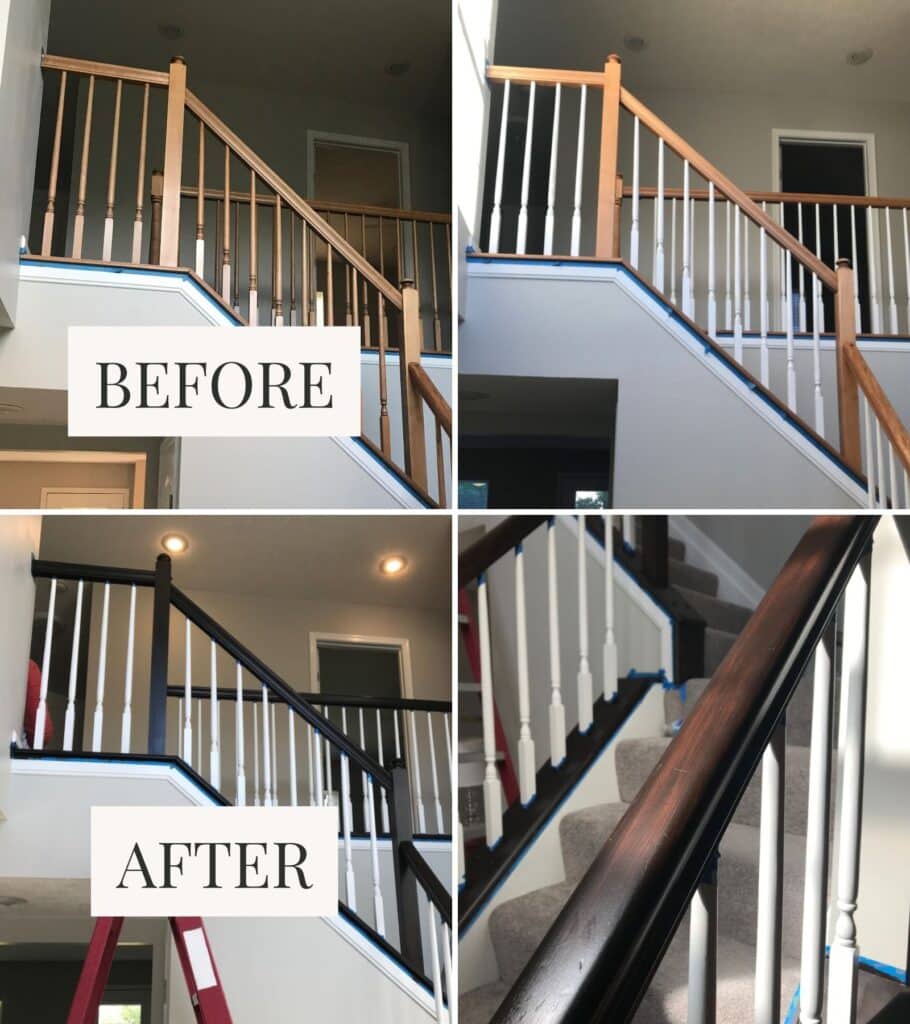
Gel staining my wood banisters completely changed the look and feel of my entryway. It went from looking very builder-grade and unfinished, to elegant and classic.
Now that you have the inspiration and motivation, let’s figure out how to stain your staircase banister!
Materials Needed:
- Gel stain
- Sponge brushes
- Paintbrush
- Polycrylic (to seal and protect)
- Blue painter’s tape
- Drop cloth(s)
- Disposable gloves
- 120-grit and 220-grit sandpaper
- Paper towels
1. Put Painter’s Tape Around All Edges and Set Up Drop Cloths
If you’re worried about accidentally flinging java gel stain on your nice carpet or walls, this step is especially for you. 😊
Put your painter’s tape on all edges that touch the surface you’re about to gel stain. So this includes any walls, trim, and edges that touch any area of your banister. Don’t forget to blue tape the bottoms and tops of your spindles so you don’t get any stain there either (unless you are painting them white like mine, then you can tape after step 2).
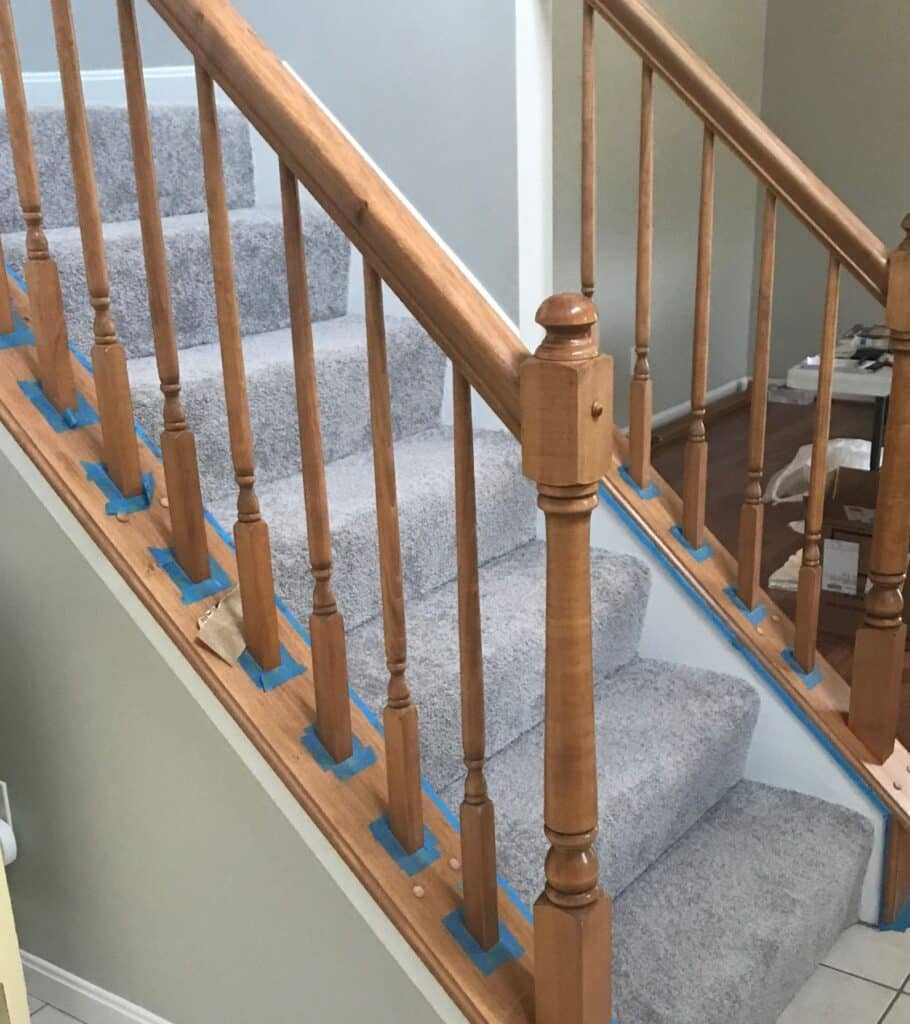
Place your drop cloths along your stairs and any flooring around your staining area. Line any tile or carpet directly next to your banisters. While you’re working, you may need to readjust your drop cloths, so just be careful and aware of where the stain is at all times.
I’ve read horror stories where stain was sitting on top of the drop cloth, and with just a little tug, the stain came tumbling down the stairs. Now that’s a MESS you don’t want to find yourself in, so just be extra careful and try not to set your stain down if you don’t have to. That way you always know where it is!
I recommend using fabric drop cloths as opposed to plastic ones, mainly for the above reason. Fabric drop cloths will perfectly hug your stairs, whereas plastic adds a slipping hazard while walking on the carpet.
I use these drop cloths for EVERY. SINGLE. PROJECT.
They come in a bunch of different sizes to fit your needs and can be washed for reuse. Also very nice quality for a drop cloth, they can truly last for years if you take care of them!
2. Sand Those Banisters!
Now that you have a stain-proof shield setup around your staircase, it’s time to sand your banisters. I’m not going to lie, this is probably the most un-fun step – but at least it’s early on!
And yes, this part is necessary.
Using 220-grit sandpaper, sand the sheen (or shine) off the banisters. This means every inch of your banisters. Even if you can’t see the sheen, you need to sand your banisters so you set yourself up for the smoothest, most perfect gel stain banister finish.
Just put a little pressure behind the sandpaper, you’re not trying to erase the banisters from existence! Remember, you’re just trying to scuff the surface up so that it’s not only smooth but so that your stain can penetrate the banister.
If you’re painting the spindles white, now is a good time to sand them as well. That way you get all of your sanding out of the way now, and don’t have to do this again!
Once you’ve completely sanded your banisters, take several damp paper towels and wipe the surface of your sanded banisters. This will collect all of the sanded particles so they don’t interfere with the gel stain. Do this until you can wipe your hand across your banister and don’t feel any particles.
3. Apply Gel Stain to Banisters
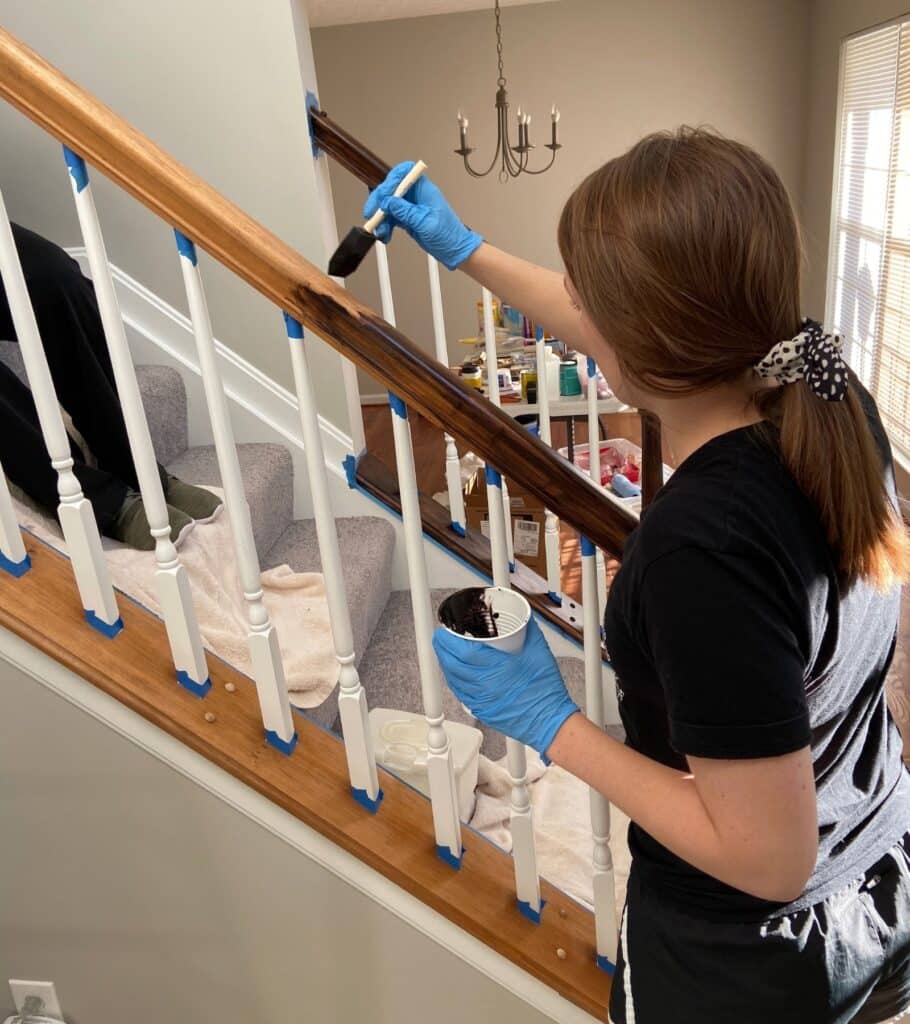
It’s officially time for the transformation to begin. Let’s take those ugly banisters and turn them into something they were always made to be: beautiful!
My Recommended Gel Stain
General Finishes Gel Stain is the best gel stain for this staircase project. It’s a high-quality stain that’s easy to apply to banisters. I personally used the java color – and as you can see, it’s absolutely gorgeous! The General Finishes Gel Stain is oil-based, and the final product will leave you happy for years to come!
First things first, snap on those disposable gloves because you do not want to be scrubbing stain off your hands.
Using a sponge brush, apply the gel stain to your banisters. Don’t be afraid to really put it on there. The goal is for the stain to penetrate the banister so you can use a little more than what feels right. With nice brush strokes going with the grain, spread the stain onto the surface.
When you get to the base of the banister, you’ll be getting dangerously close to the carpet or surrounding flooring. Take a deep breath and believe in yourself! You’ve got this! Just keep a very steady hand, and make sure your drop cloth is covering as much as it can leading up to the banister.
Something you can do for extra protection, even though it sounds slightly ridiculous, is to take painter’s tape and double it up on the carpet. I ended up doing this and was successful in not getting a drop of stain on the carpet!
Oh btw, this is your FIRST coat of gel stain. Let the stain completely dry according to the product directions. If you’re using General Finishes Java Gel Stain as I did for my banister makeover, wait 12-24 hours before applying the second coat. I tend to lean closer to the 24-hour mark to ensure everything is completely dry.
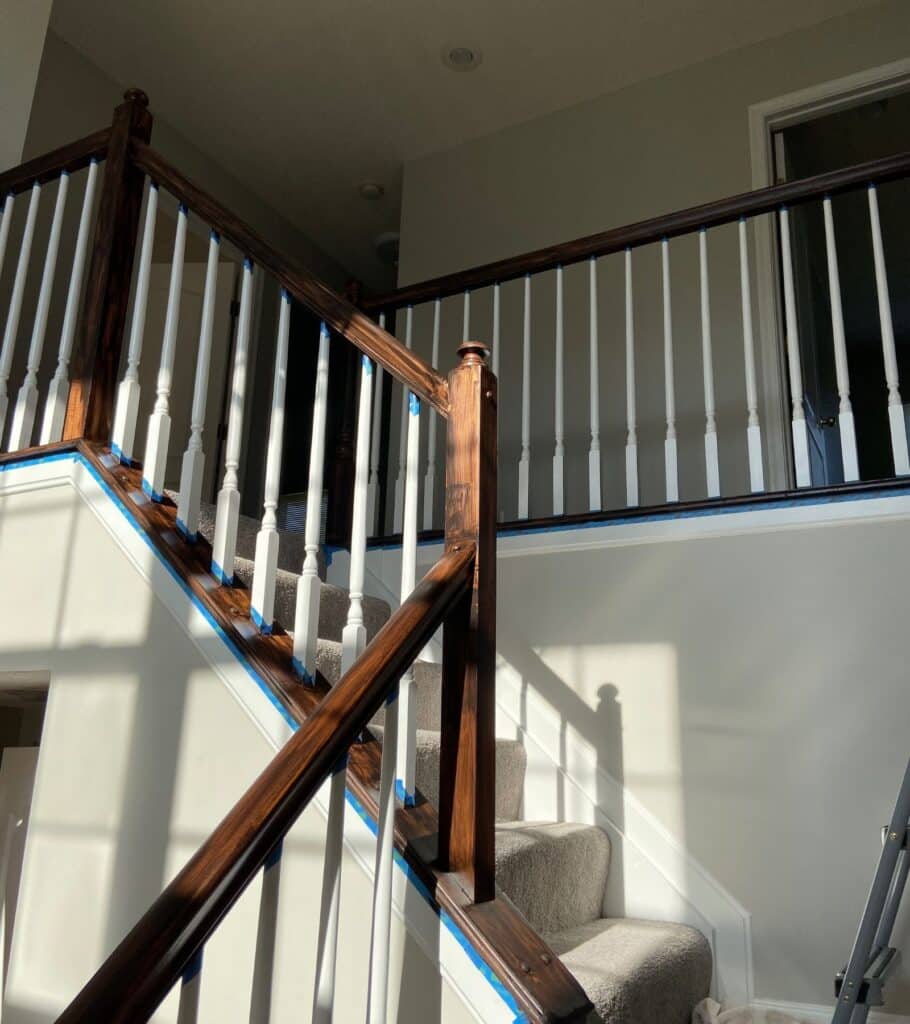
Are you supposed to wipe off the gel stain? Unlike when you use regular stain for other pieces of furniture, such as a butcher block desk, gel stain does not need to be wiped off in between coats. However, if you’re going for a lighter look, you can wipe off in between coats with a microfiber cloth. Totally your preference!
4. Second Coat of Java Gel Stain
Once your gel stain is dry, it’s time for round 2. You will see how the first coat made the banister a little dark, but it’s probably not quite where you want it yet.
If you see the original color shining through a little bit, you did it right! But this is exactly why we need a second coat.
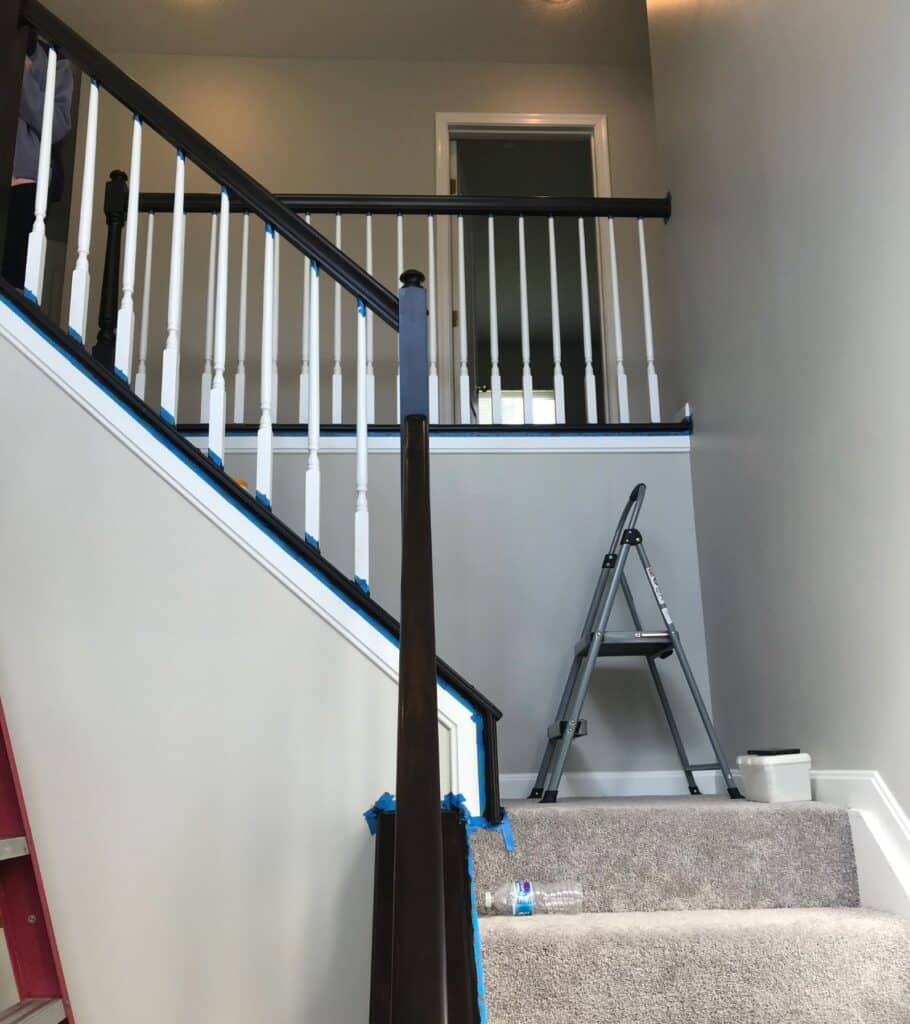
Using a new sponge brush, apply the second coat of gel stain to your banisters. Continue your brush strokes with the grain so that the stain looks good once it dries.
So now it’s decision time. You can either put the gel stain on really heavy like the first coat, or you can do a normal amount this time around. For reference, I just did a normal amount, like the amount you’d use when painting a wall. I didn’t want mine to be super dark, but instead wanted more of a java, caramel color.
After applying the second coat, let it dry for another 12-24 hours. Come back and take a look to see if you’re happy with how it looks. If you’re not happy and want a darker look, you’re moving on to round 3 of gel stain! You’ll just repeat the staining process above.
If you’re happy then you’re moving on to step 5: Polycrylic!
5. Seal Your Banisters with Polycrylic
Your stained staircase should be looking reallyyyy nice at this point! Like night and day difference kind of nice. You’re ready to seal up those banisters with Polycrylic.
What is the purpose of using Polycrylic on your newly stained banisters? Polycrylic protects your stained surface so that it lasts a really long time. So in a high-traffic area like your staircase, your handrail will constantly be in use. This means you will absolutely need to use Polycrylic, or another type of polyurethane, to protect it from constant use over the years.
I mean c’mon, this is a lot of work – you don’t want to do this again in a few years. We want it to look this way for as long as it possibly can. And it will! As long as you seal it.
Want to learn more about what Polycrylic does? Read my full post on how to seal butcher block with Polycrylic.
I personally used the Clear Satin finish. You can find it at Lowe’s.
Using your paintbrush, apply the Polycrylic to your banister.
Now since Polycrylic is clear, you’ll really want to keep track of where you apply this stuff. You’ll be able to tell to a certain point, but it’ll become increasingly more difficult as it dries. My tip is to go section by section, if you weren’t already doing this – that way you’ll be able to keep track!
The label states it takes Minwax Polycrylic 2 hours to dry, however, I typically wait at least 4 hours for extra precaution. Follow your product label if using anything else to determine how long to wait for it to dry.
Polycrylic is ultra-fast drying which means we can apply the second coat that much sooner. Yes, I said it – second coat. Hang in there, you are SO close to being done!
Before we get to the second coat though, we’ll need to sand ONE. LAST. TIME. Thank goodness!
Sand
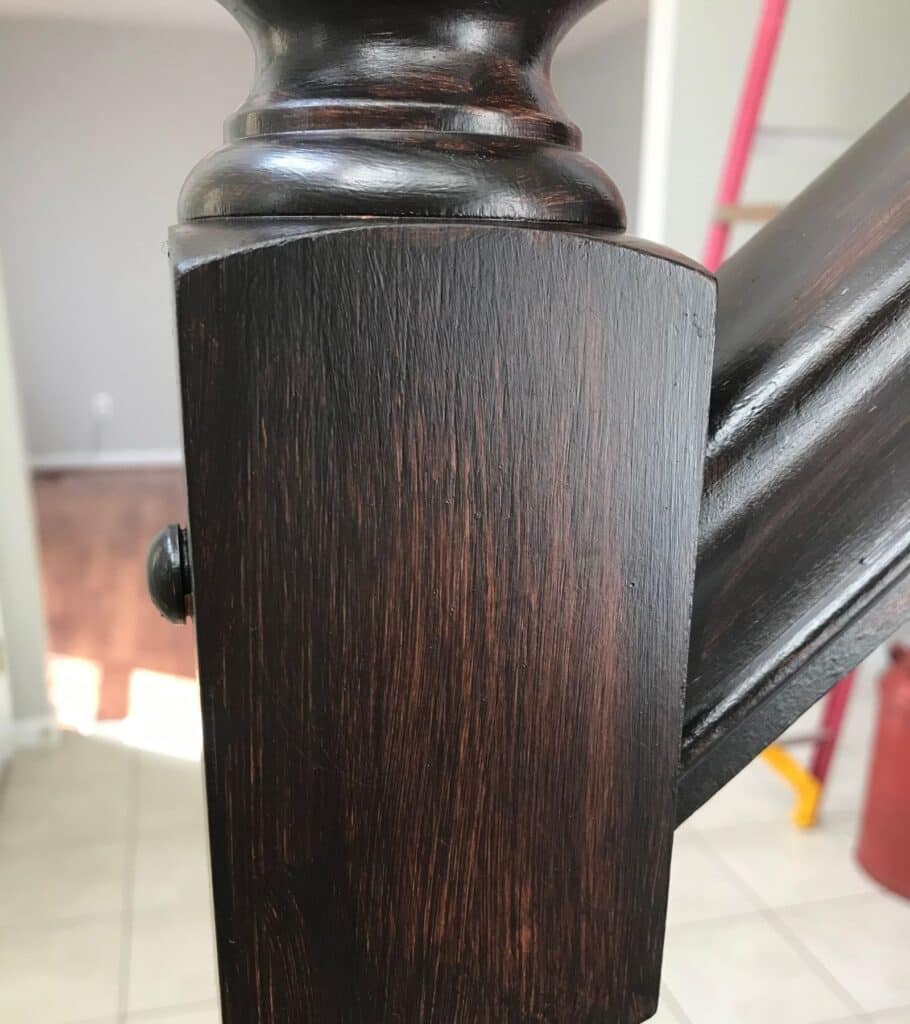
Take your 120-grit sandpaper, and lightly…let me say it again, LIGHTLY sand the surface. But why do I need to sand the first coat of Polycrylic? I’ve already done so much sanding!
When you originally apply the first coat of Polycrylic, there are bound to be imperfections being your first layer on top of the stain. So you’ll want to lightly sand down the entire surface. Just barely apply pressure when sanding the Polycrylic.
Use a damp paper towel to wipe the surface clean of all dust particles caused by sanding.
6. Final Step: Second Coat of Polycrylic
You’ve made it to the final step in your gel stain banister transformation! Woohoo!
Apply a second coat of Polycrylic to the banister. For the second coat of Polycrylic, you’re going to want a normal amount, and maybe even just a touch less. Since this is your final coat, be sure to paint it on with nice brush strokes – you don’t want to see any brush strokes in your finished product!
The best way to do this is to make sure you are applying a nice even coat, going with the grain.
You will not be sanding the second coat of Polycrylic! So sit that sandpaper down!
You’re now able to remove the painter’s tape. Be EXTREMELY careful and go slow when removing the painter’s tape. Going too fast, you risk peeling up some of your newly stained banisters.
If you find it really hard to peel up, use a utility knife to cut between the tape and the stain. Fingers crossed you don’t have this issue, but if you do, the utility knife will be your best friend.
CONGRATS! You are now finished and have beautiful gel stain banisters to appreciate both how STUNNING they look, AND the fact that YOU did that. Time to pat yourself on the back! 😊
If you’re painting your spindles…
For those of you painting your staircase spindles white like mine, once the second coat of Polycrylic is dry, reverse your painter’s tape. So put your painter’s tape on your newly stained and sealed banister surface around the tops and bottoms of your spindles.
This way absolutely ZERO paint gets on your beautiful new gel-stained banisters!
In all honesty, it doesn’t matter the order in whether you paint the spindles first, then stain…or stain first, then paint the spindles. It’s merely preference!
Using a new paintbrush, begin to paint all spindles white. You’re definitely going to need a second coat of paint once the first coat dries. This way your spindles are super white and the old color isn’t showing through at all (unlike this being okay with the banisters, we don’t want ANY original color showing on the spindles).
Oops! How to Remove Gel Stain from Carpet
So you accidentally got a little drop of gel stain on your carpet…it’s totally okay! Just work fast, and efficiently, and don’t forget to breathe. 😏 It’s extremely easy to get out, and chances are, you probably already have everything it takes to get it looking new again.
You’ll need:
- 1 cup of hot water
- Dishwashing soap
- Clean towels
- If the stain is still wet, use a clean towel or cloth and absorb as much gel stain as you can. Avoid moving the towel around because you don’t want to spread the stain. Try and blot up as much as you can. If the stain is already dry, no problem! Step 2 will be the same either way!
- Take a cup of hot water (just as hot as your sink can make it) and mix in several drops of dishwashing liquid. When I say dishwashing liquid, I mean the stuff you use in your sink like Dawn, not that you use with a dishwasher. Mix it around until you have very soapy water.
- Take a clean towel and get the soapy water on it. Start blotting the stain with soapy water. Use a good amount of soapy water. Dab for a couple of minutes, and then let the soapy water sit on the stain for 5-10 minutes.
- Continue to dab with your towel until the stain comes out! At this point, it’s okay to scrub a little bit if it’s being difficult!
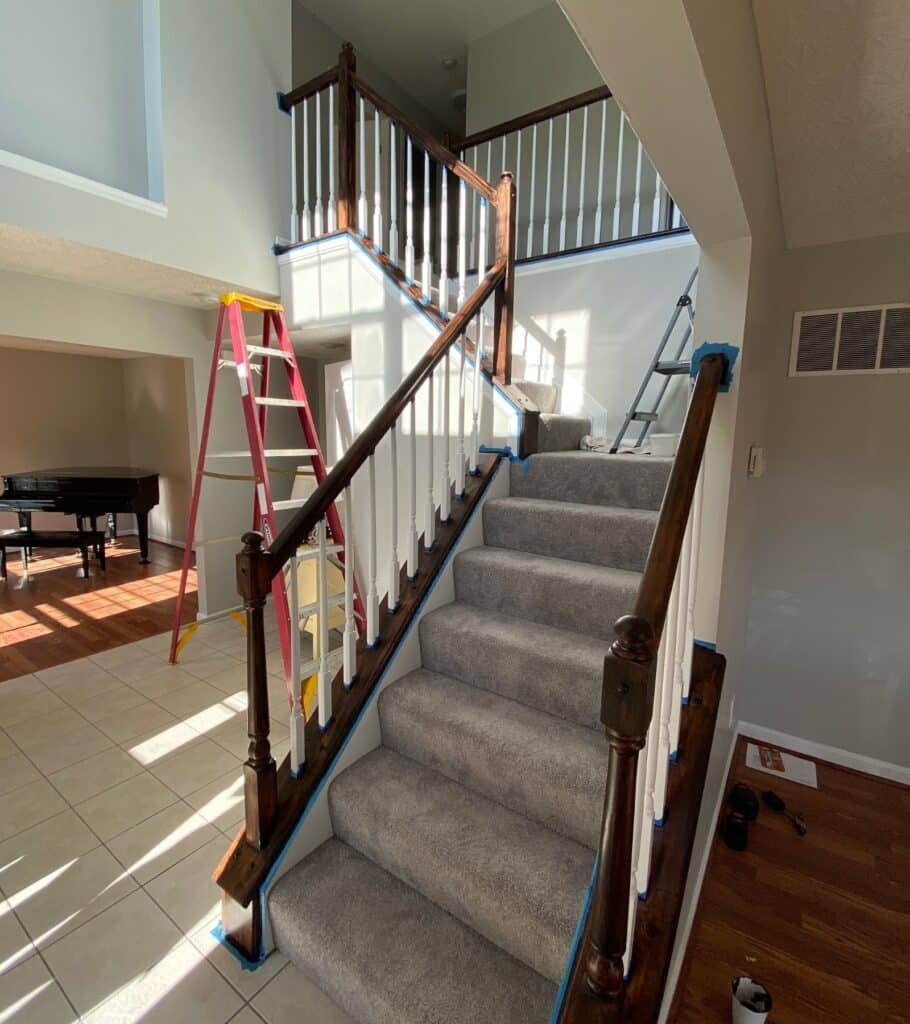
You’re ready to take on your banisters! Whether you’re saying goodbye to oak banisters, or ready for an entryway makeover, gel-staining banisters is the best way to upgrade your staircase. Java gel-stained banisters look luxurious, updated, and modern, and will completely transform your space for the better!
Other Posts You Might Like:


Hi – would it look weird if I did the banisters Java and spindles white if my wood floors are still oak??
I’ve re-read this article so many time sun preparation for this fall project now! Feel totally prepared! Thank you! One important question though. How long does each coat take to dry? The stairs are a high traffic area and trying to really approximate how and when to get this done.
I’m so excited for you to tackle this project! General Finishes recommends at least 12-24 hours for the gel stain to dry between coats. I typically lean closer to 24 hours, but there are some different factors like temperature and humidity that may slow down or speed up those times. Like you said, the stairs are a busy area – I also had a hard time not reaching for the banister just out of habit. I found that timing it out later in the afternoon allowed for me to sleep through majority of the drying process overnight! 😊 Best of luck on your project – it’s going to turn out so good! -Alley
Are there any other directions on the panted white spindles? Do I need to paint a coat of primer first, before painting them white? I have oak spindles, thank you.
Hi Catherine! This is a great question – you can follow these steps to paint your oak spindles white just like I did:
1. Use blue painter’s tape around the tops and bottoms of your spindles so that paint doesn’t get on your banisters.
2. Lightly sand all spindles with 220-grit sandpaper to remove the current protective layer.
3. Take a damp paper towel or microfiber towel over the sanded spindles to remove any of the sanding dust.
4. Prime your spindles – for oak spindles you should only need one coat. I’d recommend two coats of primer if they were darker.
5. Once the primer is dry, paint on your first coat of white paint using your paintbrush.
6. Once your first coat of paint is dry, paint on your second coat.
7. Once all paint is dry, use Polycrylic to protect your paint. I’d recommend two coats of Polycrylic since stairs see a lot of traffic. I always use Clear Satin, but there are different sheens available!
I hope this helps you get those spindles looking beautiful! 🙂 -Alley
Thank you for the easiest instructions for staining with Java Stain! That will make me get motivated to do this!
One question the stain is oil based, so I can use the water based Polyacrylic on top of oiled based!
Wouldn’t the Polyacrylic peel off! Sorry if I sound dumb but I don’t want to ruin my paint job…
Thanks Candy
Hi Candy! That is a great question and the answer is yes, you can definitely use water-based Polycrylic on top of the oil-based stain without any issues! The most important thing to remember is to ensure the oil-based stain has completely dried before applying the water-based Polycrylic. As long as you follow that rule, you’ll be good to go and will have a beautifully stained and protected banister in no time. Best of luck on your project – you’ve got this! 🙂 -Alley
Thank you so much for showing and telling the steps on staining…I am staring on my Oak mantels ( my practice run) before I tackle my stairs using GF Java Stain… Cannot wait to see it all finished.
Hope mine looks as good as yours.
Monika
.
That is so exciting that you are staining your oak mantels with the Java Stain! It is going to look SO good! You will have to let us know how both projects turn out. 🙂