The below post may contain affiliate links. This means we will receive a commission if you purchase through our link, with no extra cost to you. As an Amazon Associate we earn from qualifying purchases. Read our full disclaimer.
Making your own DIY butcher block desk is affordable, and very simple. In this post, I’ll be going over step-by-step how you can do this in one weekend!
A piece of butcher block is perfect for a desk. It’s budget-friendly, durable, and definitely has that “wow” factor. Plus, it’s thick enough so that you don’t have to worry about it sagging or warping over time.
Tools and Materials Needed
- Unfinished Butcher Block (Unfinished Birch)
- Sponge Brush
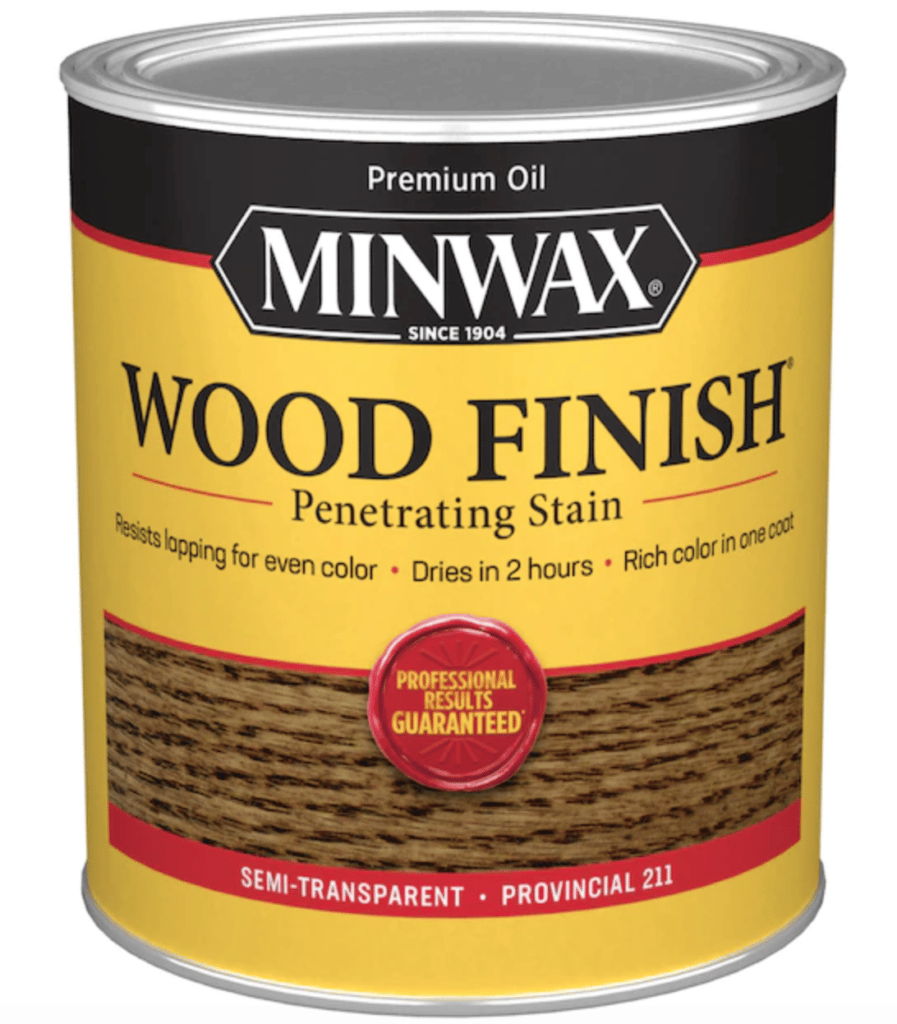
- Minwax Stain or stain of your choice
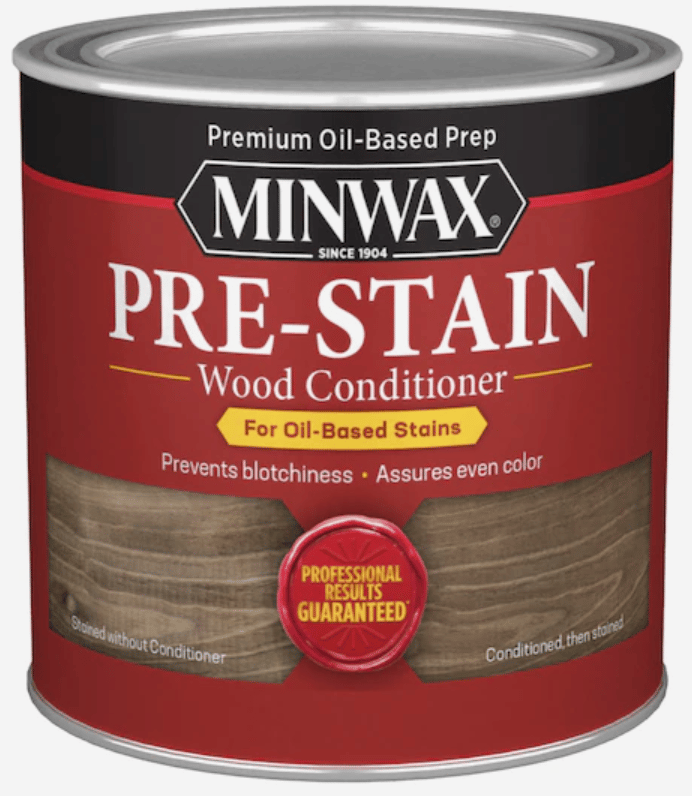
- Minwax Pre-Stain
- Minwax Polycrylic Water-Based Sealer (Clear Satin)
- Legs
- Drill
- Drill Bits
- Sandpaper
- Gloves
- Microfiber Towels
IMPORTANT: Dispose of staining rags properly.
Before you stain or pre-stain any piece of wood, make sure you know how to dispose of staining rags properly. Oil-based products are highly flammable and need to be disposed of safely after use.
Read this article, How to Safely Dispose of Staining/Rags Materials by Handmade Home Co.
1. Measure Your Space
The first thing you’ll want to do before diving into creating your desk is determine what size butcher block will work best in your space. They come in several different sizes. Desk placement in your home office should not be overlooked, and this is the perfect time to get it right!
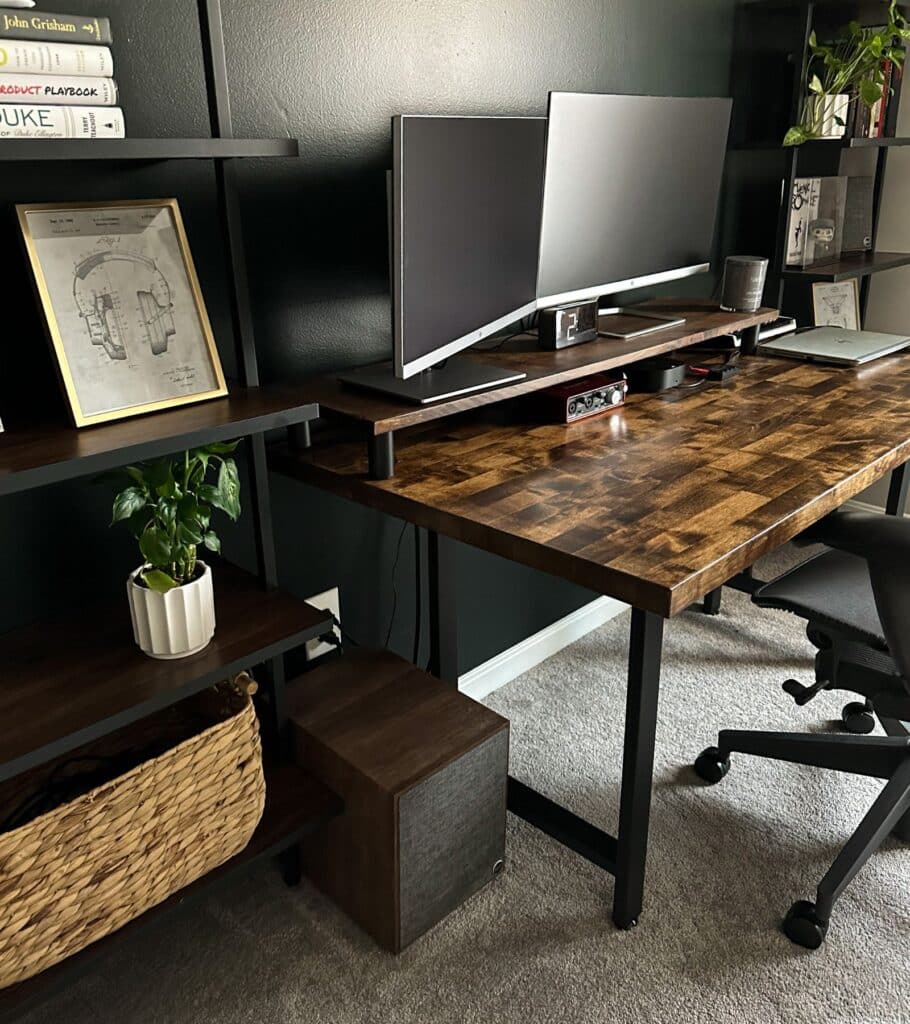
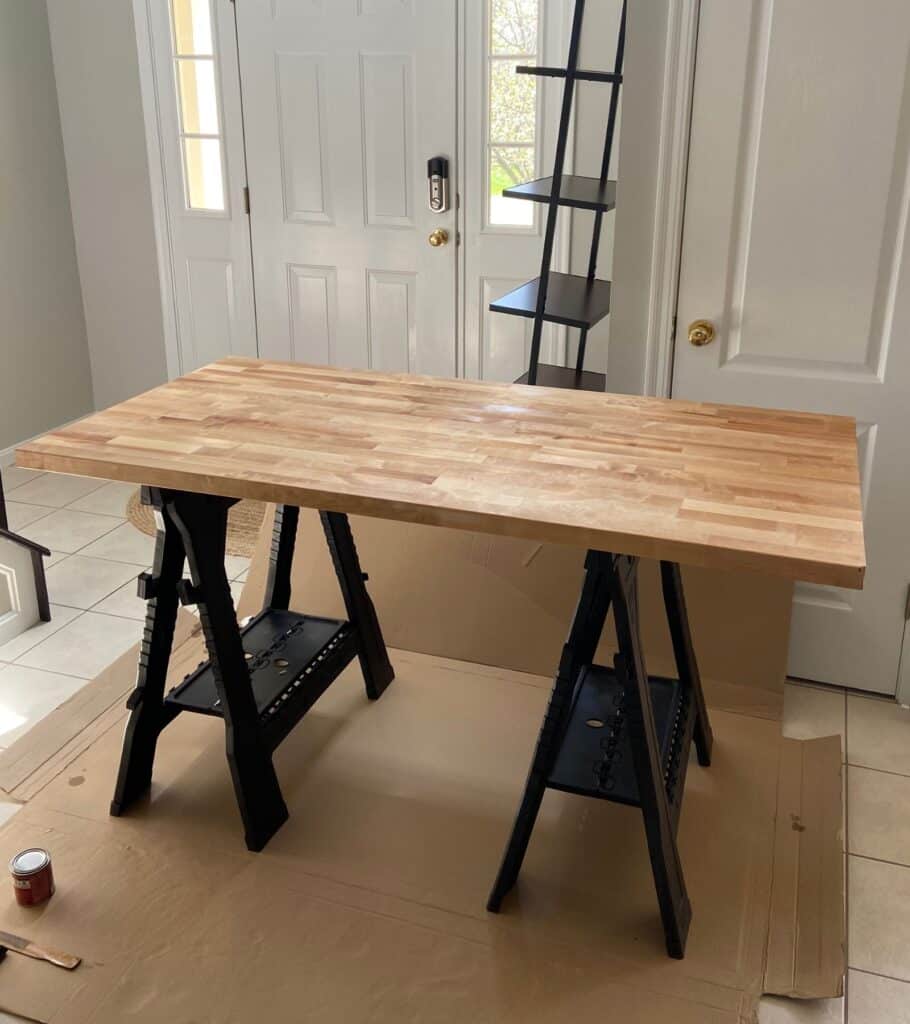
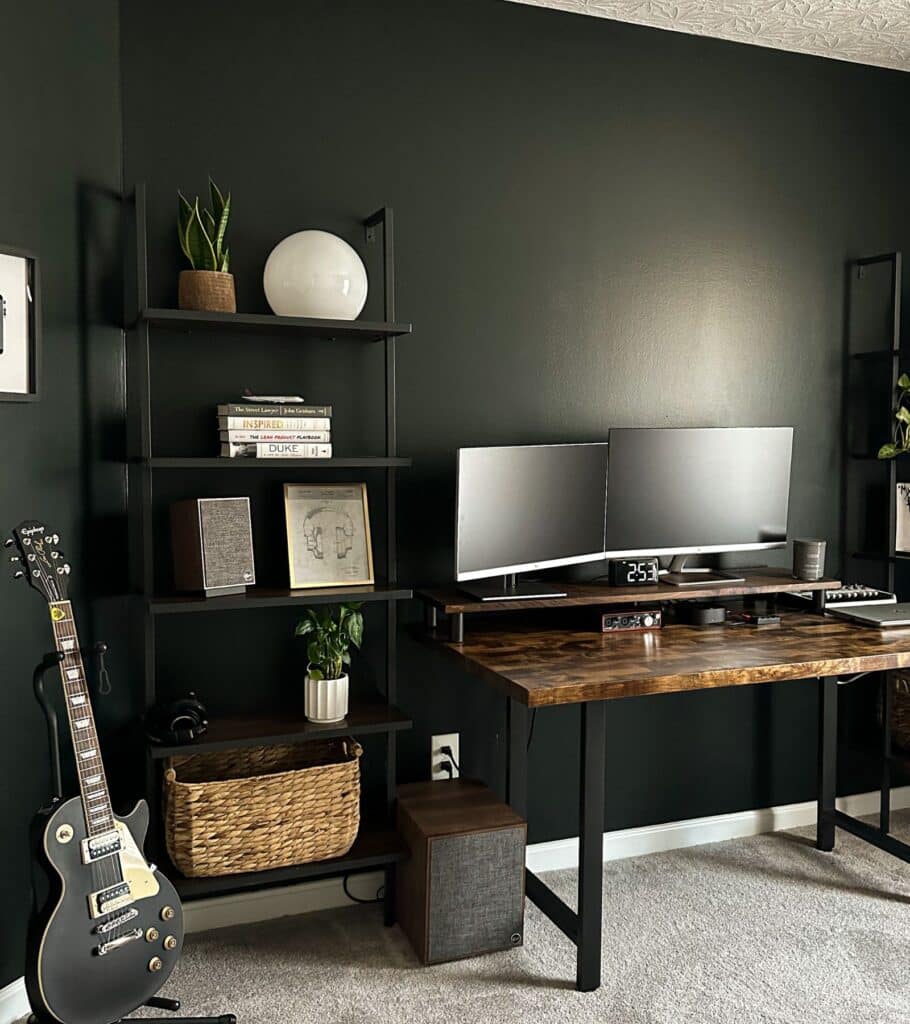
Pictured below is a 60-inch x 30-inch desk. I found this to be the optimal size for including several computer monitors while still having plenty of open space.
Note for when you purchase your butcher block, this thing is heavy! I would highly recommend shipping it to your house so you don’t have to deal with a truck or the struggle of hauling it through the store.
2. Choose a Stain Color
It’s time to go to your local hardware store and pick your favorite oil-based stain. Let’s put on our design eye for a second. Look around your office. Do you have darker pieces or lighter pieces? What stain color will compliment your space best?
These are questions to ask yourself as you’re trying to find that perfect color. And remember, at the store the color on the can may not appear super accurate to how it turns out. I recommend watching this video that gives real-life examples of popular stain colors. (P.S. You will find the Minwax brand at Lowe’s).
The video helped me narrow down to Provincial which was what I ultimately ended up choosing – and let me tell you it is gorgeous! The golden honey look is truly a statement piece for any home office.
If you’re looking for an in-depth look into the staining process and have more questions, check out the easiest guide on how to stain butcher block.
3. Pre-stain Wood Conditioner
To help the wood take the stain more easily, I would recommend using a pre-stain wood conditioner. This step in the process is definitely not necessary. However, if you are using a dark stain on light wood, it will result in a smoother finish. The pre-stain will also help prevent streaks or blotchiness (and who wants that?).
The pre-stain wood conditioner I recommend for a butcher block desk is the Oil-based Minwax Pre-stain. It comes in both oil-based and water-based.
One coat should be enough for your simple butcher block desk project! Apply the pre-stain, wait 15 mins, and wipe away excess conditioner with a clean microfiber cloth. When applying, go with the grain of the wood. Be sure to apply your stain within 2 hours after pre-staining for the best results!
4. Stain Your Butcher Block Desk
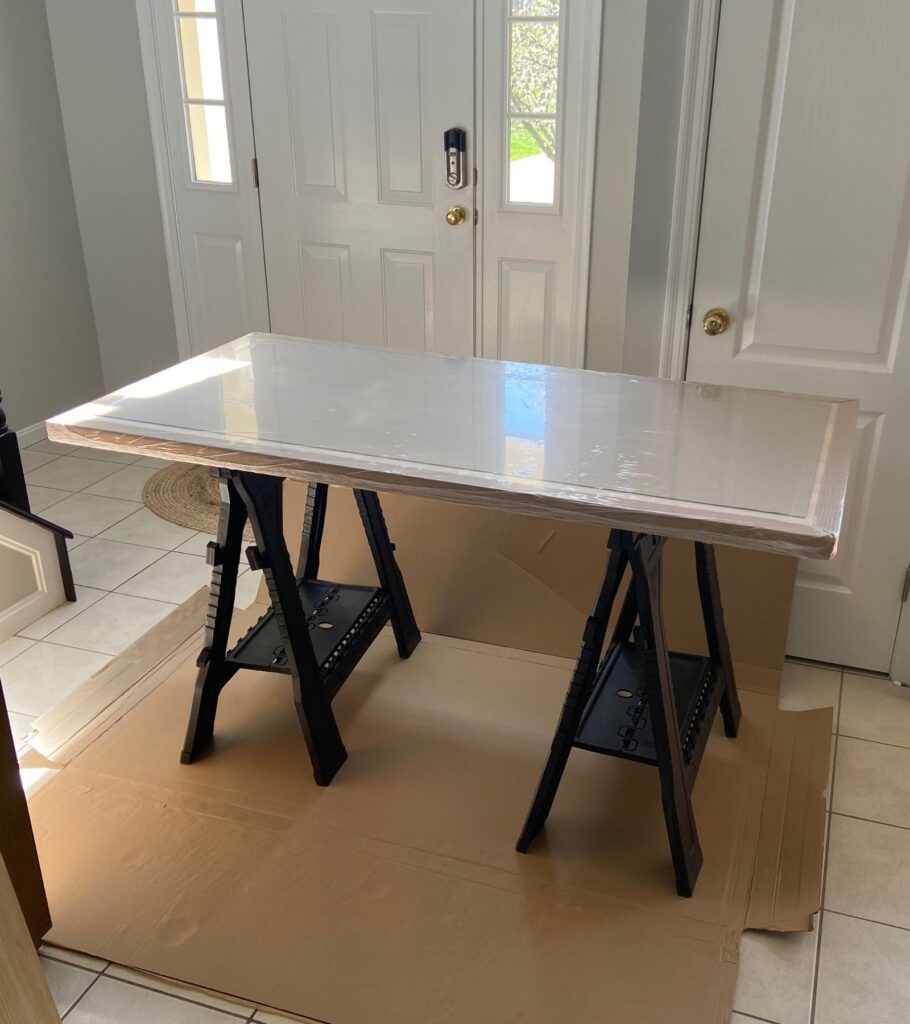
I highly recommend using folding saw horses to prop your butcher block up when staining.
To achieve the look in my pictures, I used 2 coats of stain.
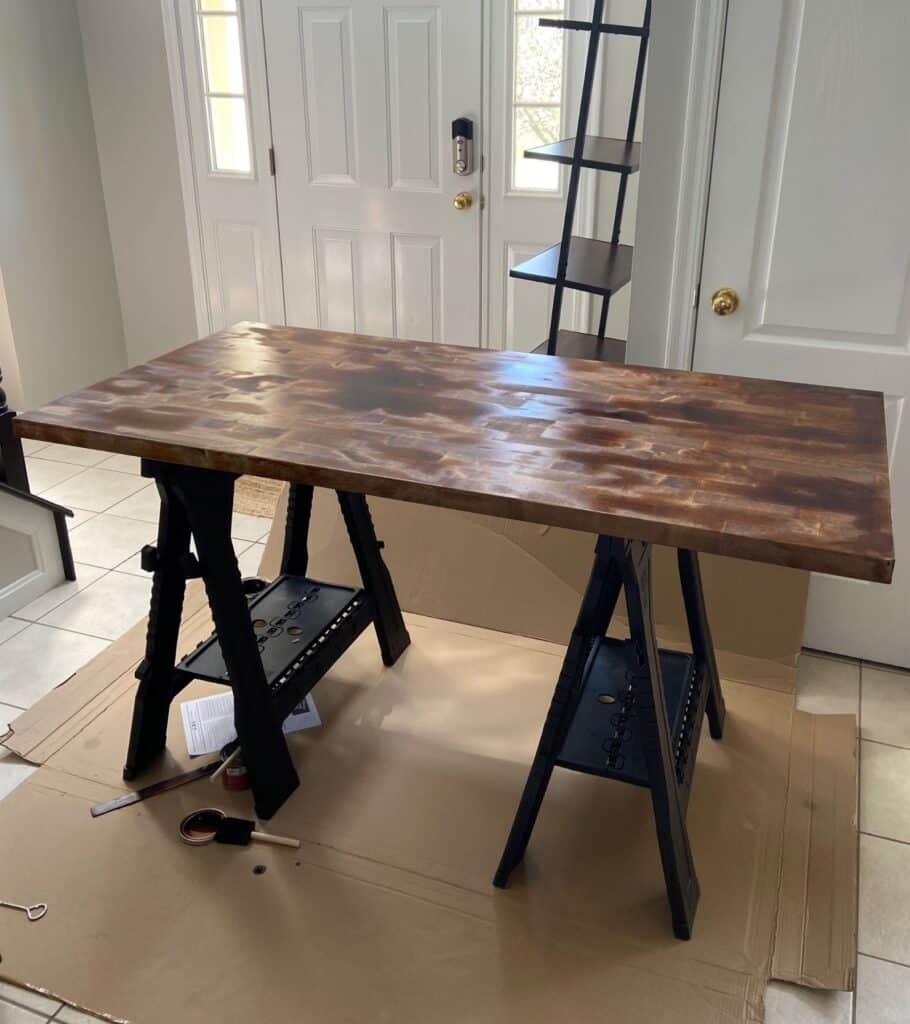
First Coat of Stain
For the first coat, apply a generous amount of stain and paint it on with a sponge brush going with the grain of the wood. You will want a thick layer so it has enough stain to soak into the butcher block.
Once you have the top and sides coated with stain:
Set a timer for 15 minutes.
When the timer is up, use your microfiber towel to wipe off the excess stain. Be sure to get it all up, and check for drips underneath.
Set a timer for 4 hours.
This is how long it takes for the stain to dry. After the time is up, flip your butcher block over and repeat the process above to finish staining the underside.
Additional Coats
After your first coat is completely done, you may want to add a second coat of stain to make the wood look darker. While this step isn’t necessary, you can continue adding coats until you are satisfied with the color.
5. Seal it Up
Once your stain looks perfect to you, it is very important to seal your butcher block.
Be sure to wait at least 24 hours between staining and applying your sealer to ensure the stain is completely dry!
Why is it important to seal your butcher block? Sealing provides an extra layer of protection so your stain doesn’t wear away. Don’t skip this step!
What sealer should I use?
You might see different oils, such as Tung Oil or Mineral Oil being used to seal tables. However, I highly recommend using Polycrylic, and I’ll tell you why.
Tung Oil and Mineral Oil will consistently need reapplying to keep up with the benefits over time. For an office, you’re not going to want to go through the process of clearing everything off your desk every couple of months.
Polycrylic goes on once (2-3 coats), and you never have to worry about it again. I have used Polycrylic on every staining project I have completed with great results! I get it in clear satin.
For a deeper dive, check out my guide on how to seal butcher block.
Let’s start the sealing process!
First Coat of Polycrylic
Important: Do not shake your Polycrylic. Mix using a stir stick only.
To seal your butcher block, you’re going to need 2 coats.
With a new sponge brush, begin to paint on the Polycrylic going with the grain of the wood. No need to go thick as we did with the stain!
Polycrylic by Minwax is a fast-drying sealer – it takes 2 hours to dry.
Once the Polycrylic is completely dried on both sides, you’re going to take your 220-grit sandpaper and lightly, I repeat LIGHTLY sand the Polycrylic going with the grain of the wood. Your hand should only barely be applying pressure.
The goal with sanding is to get the first coat completely rid of small imperfections or uneven spots. Do this over the whole surface.
After sanding lightly, take a new slightly damp microfiber towel and wipe off the dust before beginning your second coat of Polycrylic.
Keep in mind that once your second coat is dry, do not sand it. It is complete!
If you feel you need another coat, be sure to sand and apply the additional coat. But once you’re on that final coat, do not sand once dried.
6. Attach the Legs
Choosing the correct legs is actually pretty important to your desk’s structure.
I highly recommend going with a 4 leg style as opposed to 2 legs to reduce wobbling.
If you’re completely set on the 2 leg approach (which I was), all hope is not lost. The fix is if you’re able to put the desk completely up against the wall, or perfectly in between 2 shelves/bookcases – this will stabilize it. You can even attach it to a wall with brackets if you want maximum sturdiness.
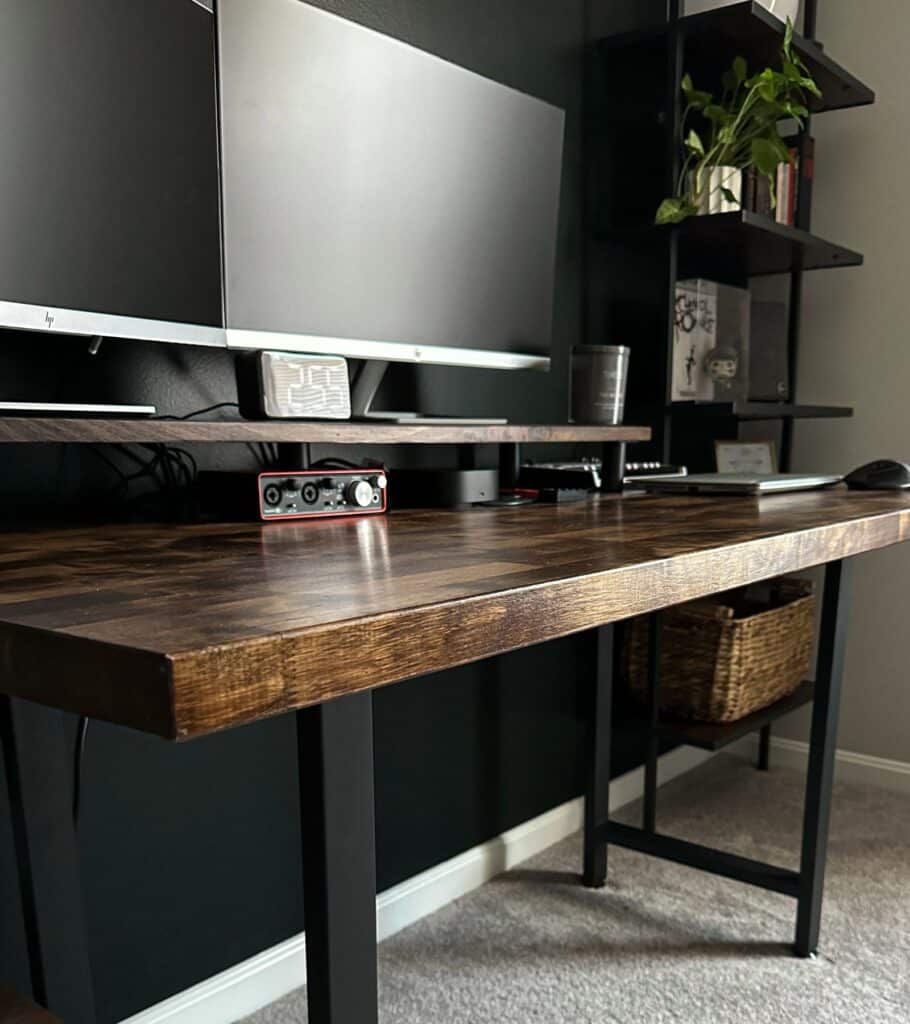
As you can see, mine is right up against the wall.
For an office that requires desk placement out in the middle of the room, or for a more delicate look, the 4 hairpin legs will get the job done. They do a lot better job stabilizing the desk, and you won’t notice wobbling. I used these on our butcher block kitchen table – they work and look wonderful!
Pilot Holes and Screws
Place your legs 2-3 inches from the corners of the table and use a pencil to mark the holes for the screws.
Now when you remove the legs, you’ll know exactly where you’ll need to drill pilot holes.
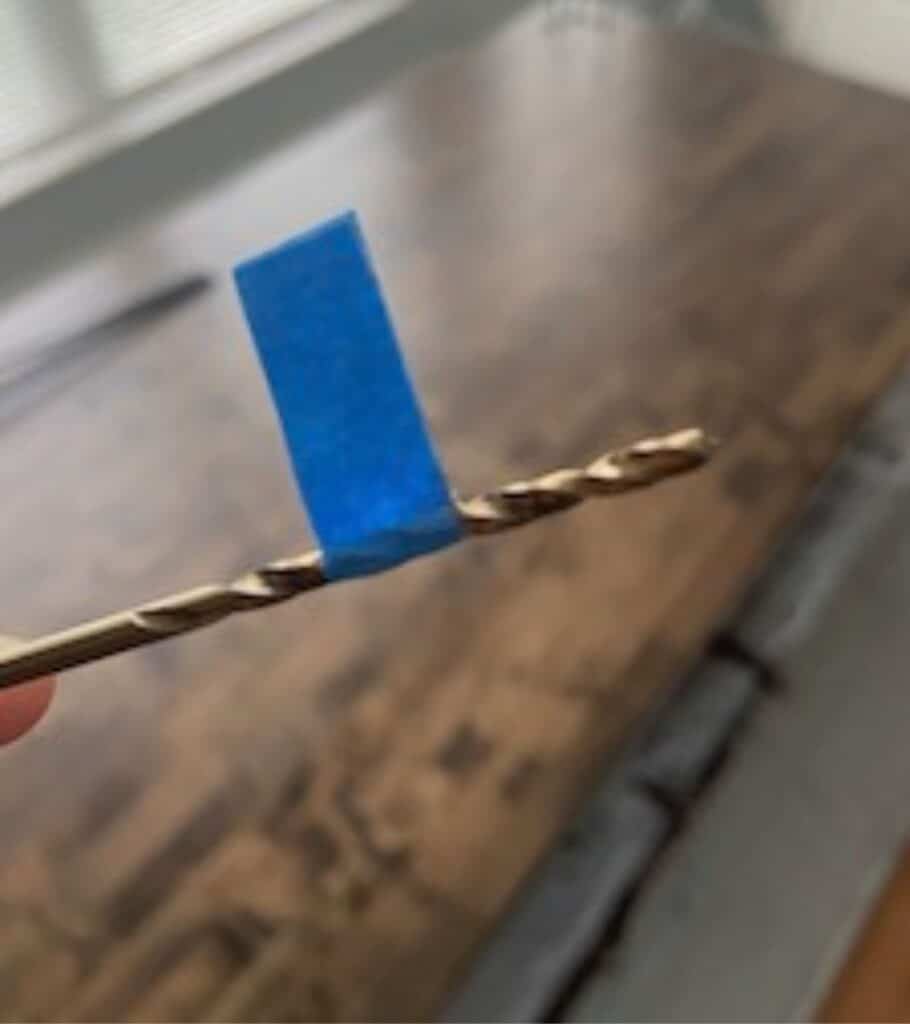
Your drill bit should be the same size as your screw, not including the threads.
Helpful tip: put a piece of blue tape on the drill bit to mark the length of the screw. That way when you drill your pilot hole, you’re drilling the perfect amount; not too little, not too much!
Why pilot holes? If you screw right into the wood with no pilot holes, you risk cracking the wood. Simple as that.
Once you have the pilot holes drilled for all the legs, use your drill to attach all of the legs with their included screws!
7. Bonus Add-Ons!
If you want to take your DIY butcher block desk to the next level, take a look at some of these additional features.
Desk Riser
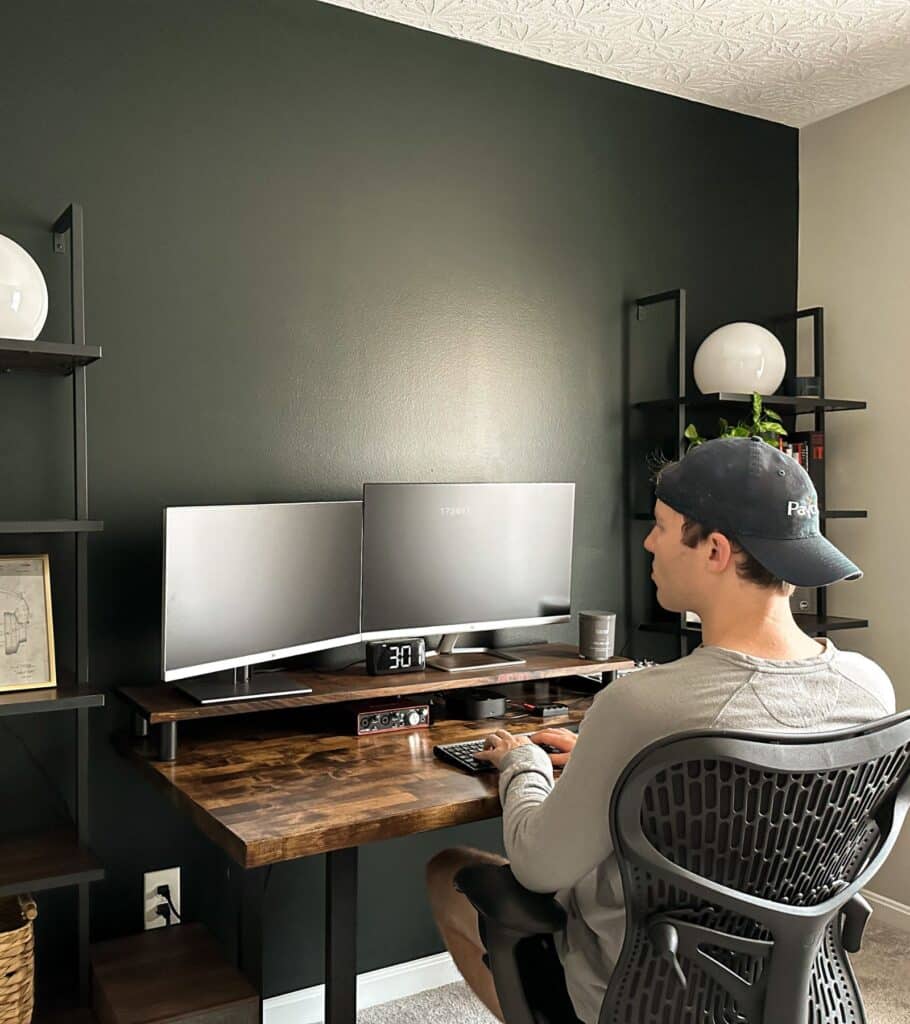
Are you looking for an elevated shelf on the back of your desk for computer monitors? I love mine because it raises my screens while I am working.
Making your own desk riser is super simple!
Go to your local hardware store and purchase one piece of wood the size of your liking. You can always saw the board down to your desired size once you’re home.
Just repeat the same exact steps that you did for staining and sealing your desk!
There are plenty of options for small legs to choose from on Amazon. I ended up going with these 3” furniture legs. They are the perfect height to bring your monitors up to eye level. In addition, they create just enough space below for other desk accessories to slide under.
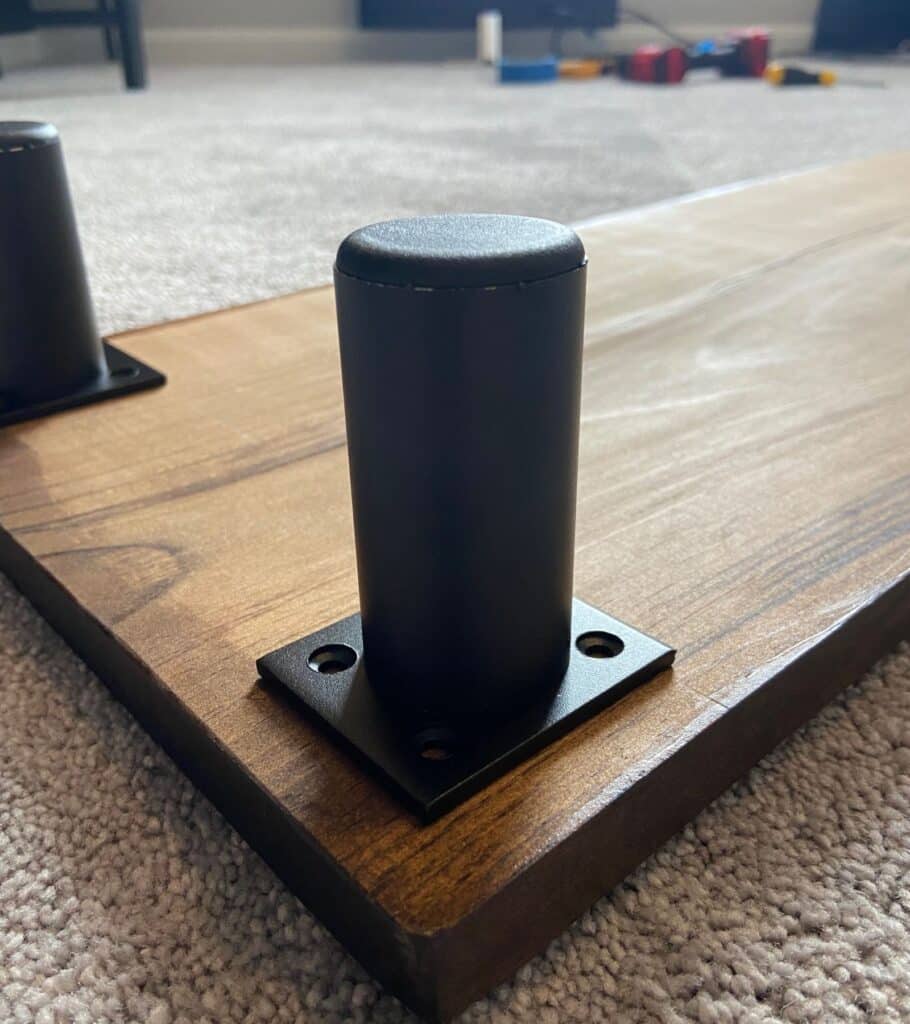
If your riser is longer than 3 feet, I recommend putting a 5th leg in the middle for support and to prevent the board from sagging or bowing.
I didn’t attach the riser to the desk just in case I wanted to move it or not use it down the road. Plus, the monitors are plenty heavy to make sure it stays in one place!
Grommet Holes
Grommet holes allow your cables to pass through a specific spot on your desk. They’re typically used for cable management but are not entirely necessary.
As long as you have a drill, you can purchase a kit like this that comes with everything you need.
If you don’t opt for the kit and have a specific grommet picked out, you’ll need to make your way to the hardware store to purchase the correct size hole saw and arbor.
Want to get fancy? You can purchase a powered grommet that includes 2 outlets, 2 USB ports, and 1 USB-C port – all seamless right on top of your desk. Just remember you’ll still need to purchase a hole saw and arbor to drill the perfect-sized hole. Most products specify the hole size in the description.
Cable Management

Once you start racking up electronic devices on your desk, your cable situation can quickly become a nightmare.
Cable management is a big need for most desks. It doesn’t take more than 30 minutes to achieve the cord-free desk you want.
I purchased these trays that screw underneath the desk. You can also lay your power strip in the trays, so everything is up off the ground and plugged in, out of sight.
Looking for a power strip? I use GE power strips throughout our entire home and love them! They have nearly 100,000 reviews, which is very impressive.
Then there are several cords that you may want to hide outside of the tray. These adhesive cord holders are perfect for running cords on the back of desks, legs, or shelves.
Have a lot of cables that need to be grouped together? Give these velcro cable ties a try!
Side note, if you have a bunch of miscellaneous cables, accessories, or office supplies that need a home, there’s a simple solution. I purchased this and it fits perfectly in the closet. I had way too many random cables lying around. Now they are all organized in this little storage cart!
And there you have it, your very own DIY butcher block desk! It’s a lot more affordable than buying a solid wood desk from the store. Plus, how cool is it that now you get to tell everyone that you made one yourself?

Leave a Reply