The below post may contain affiliate links. This means we will receive a commission if you purchase through our link, with no extra cost to you. As an Amazon Associate we earn from qualifying purchases. Read our full disclaimer.
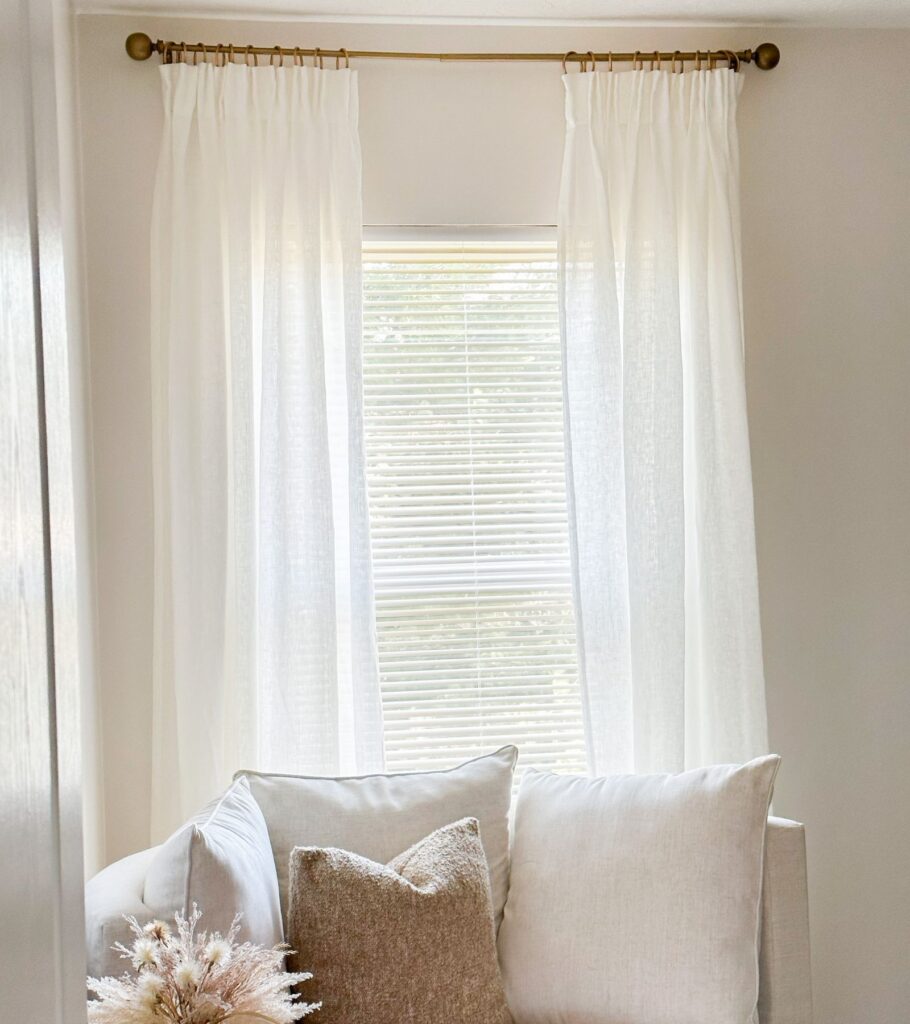
If you want to make your curtains look expensive, consider this IKEA hack all you ever needed. I mean seriously, I have purchased so many different curtains around my house and I will only use this method from here on out.
Making curtains look high-end and expensive can totally change the look and feel of a room. One of the first sets of curtains I ever purchased for my house was big, bulky, and thick. They made the room feel heavy, so I immediately took them down and returned them.
I’ve tried DIY drop cloth curtains, your typical Target curtains, and curtains that were hundreds of dollars.
Nothing compares to this IKEA hack that I’m about to tell you about! I don’t think I will ever buy another curtain or hang curtains another way – it’s simply superior to other curtains. This hack will make your curtains look modern, full, and best of all – expensive!
There’s more that goes into making a curtain look expensive than the curtain itself. You have to think about the following when thinking about how to make IKEA curtains look expensive:
- Curtain
- Pleating
- Curtain Rod
- Curtain Rings
- Wrinkle-Free
- Curtain Length
First things first, let’s take a look at the game-changing IKEA curtains!
IKEA Curtains
Trust me when I say that the look and the quality are all there, and for a relatively cheap price! And who doesn’t like cheap curtains that look expensive? 😉
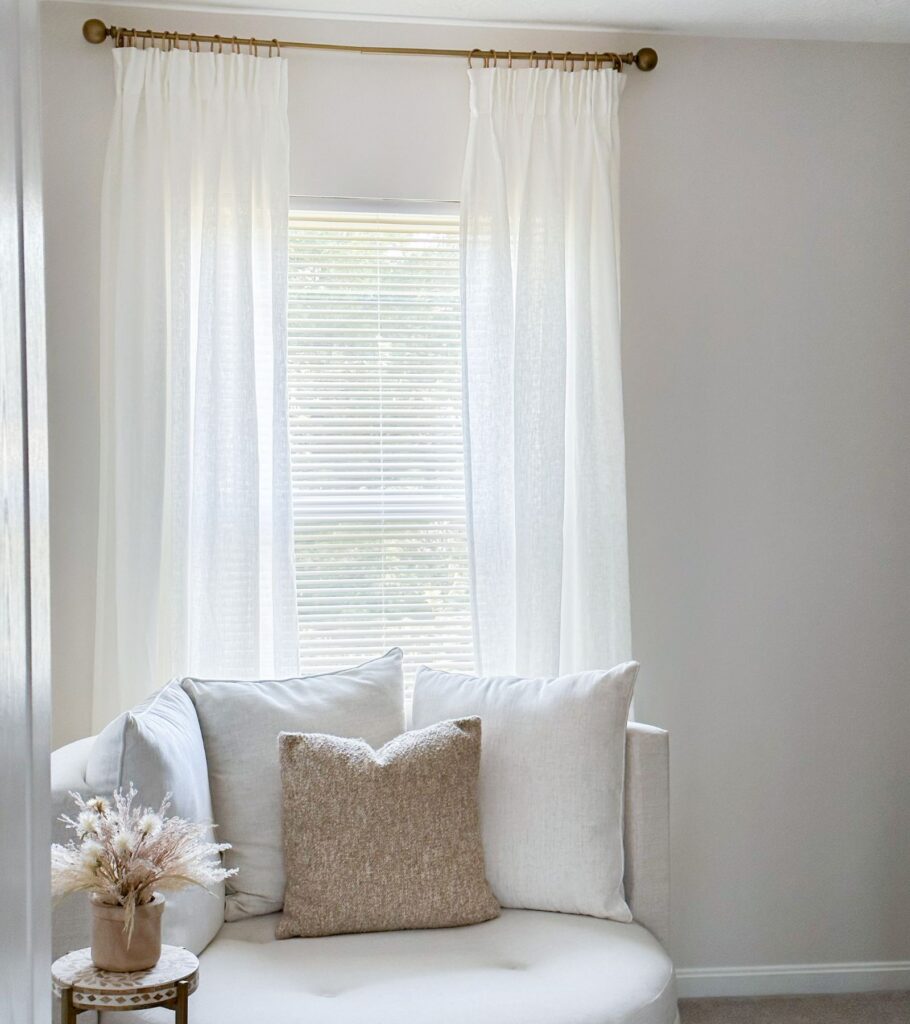
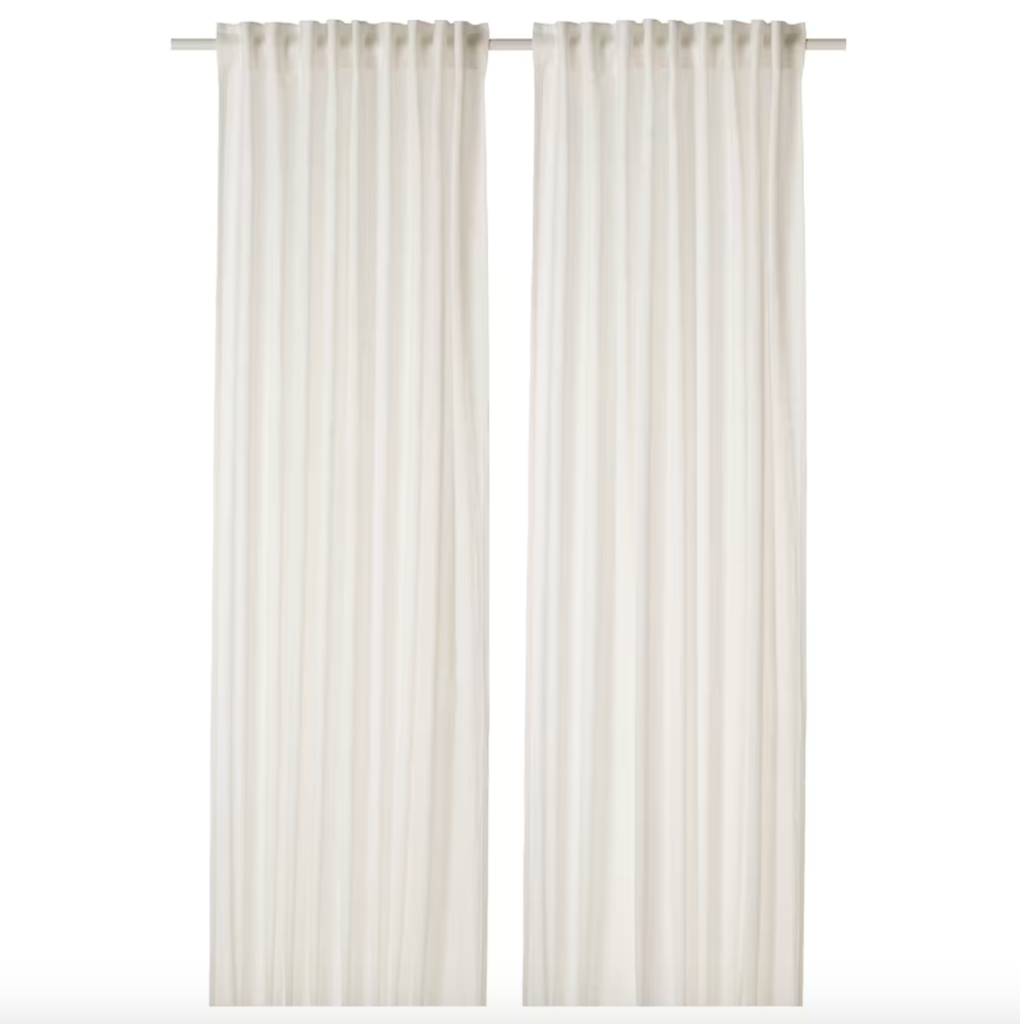
Most of the time when you go to buy curtains online, they are $50-$100 just for one panel! With these IKEA curtains, you get two panels in the pack. Finally, a store that gives us what we want (and makes sense lol, curtains should always come with two panels).
The DYTAG curtains are the best material for curtains, 100% linen. Linen gives curtains a modern look. There’s something about linen curtain texture that just adds so much to a room while keeping the space feeling light and airy.
The best thing about the DYTAG curtains is that they provide privacy while still allowing light to come through. Although I will say, they are definitely pretty see-through, so I wouldn’t rely on them for complete privacy. I still use my blinds!
Light-filtering curtains are truly the best option for any room. If you love these curtains but want the blackout curtain effect or more privacy, you can buy blackout panels to go behind them on Amazon!
I purchased this exact pair of blackout curtains for our primary bedroom & I absolutely LOVE them. They block out a decent amount of light and are not noticeable behind our patterned curtains which was something I was worried about.
However, I haven’t put them behind the DYTAG so I am unsure if you would be able to see them. The only thing to take into consideration when purchasing these blackout curtains is that they are 90% black out. Some light still comes through at the very top, by the curtain rod.
It doesn’t really bother us too much and we are still able to sleep in pretty late on a lazy Sunday morning! 😉
Pleating Your Curtains
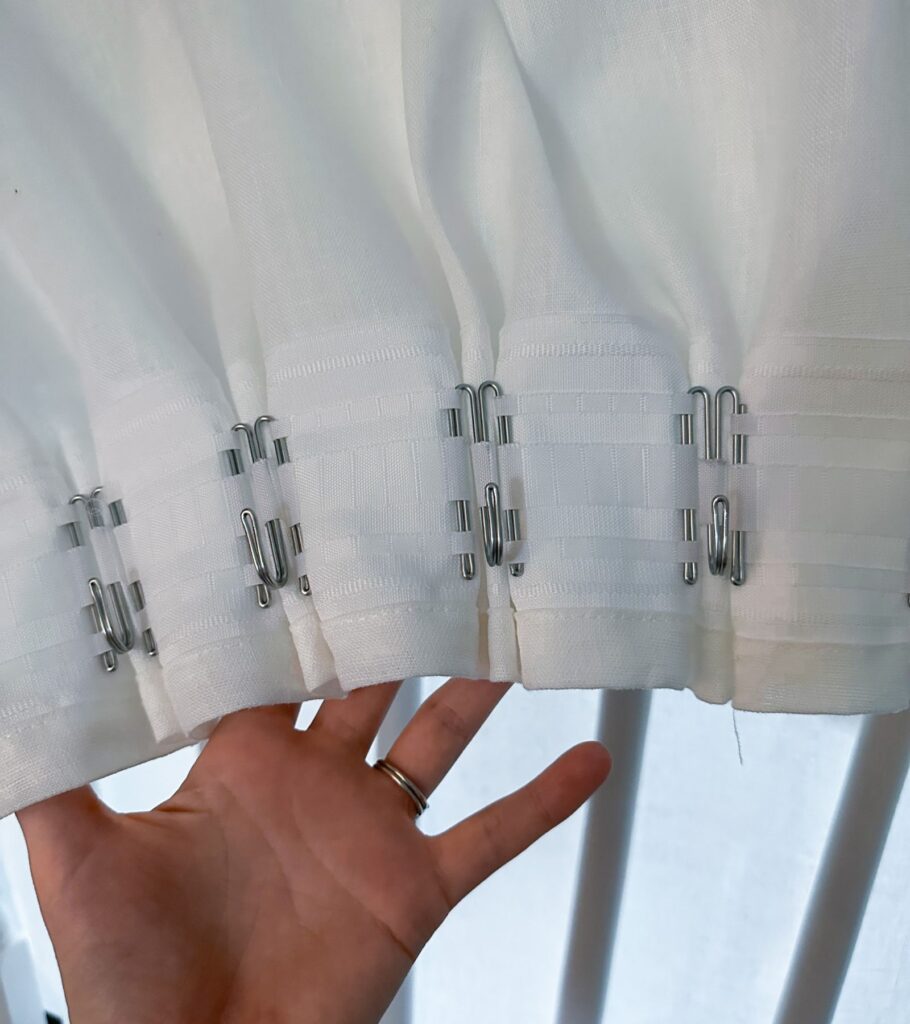
This IKEA hack wouldn’t be complete without pleating your curtains! And the great thing is that IKEA was already one step ahead of us when designing the DYTAG curtains.
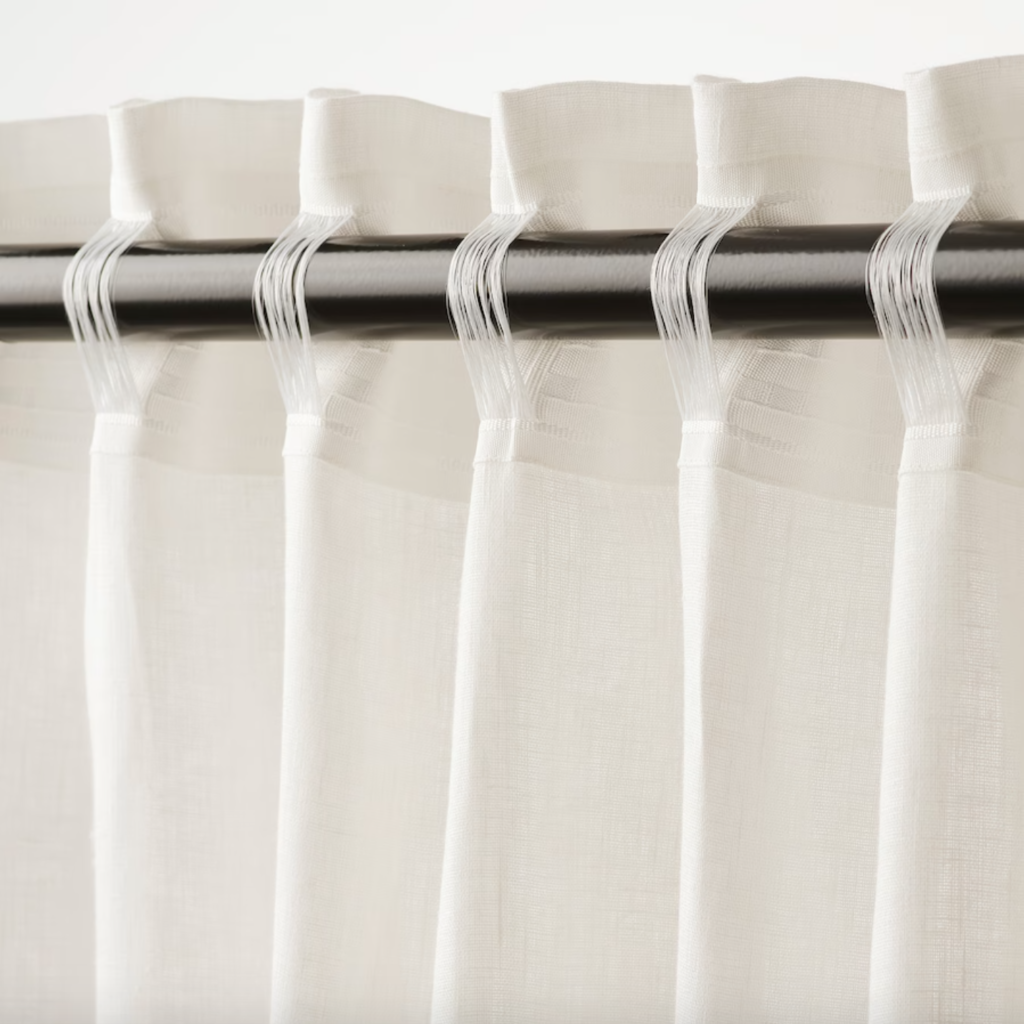
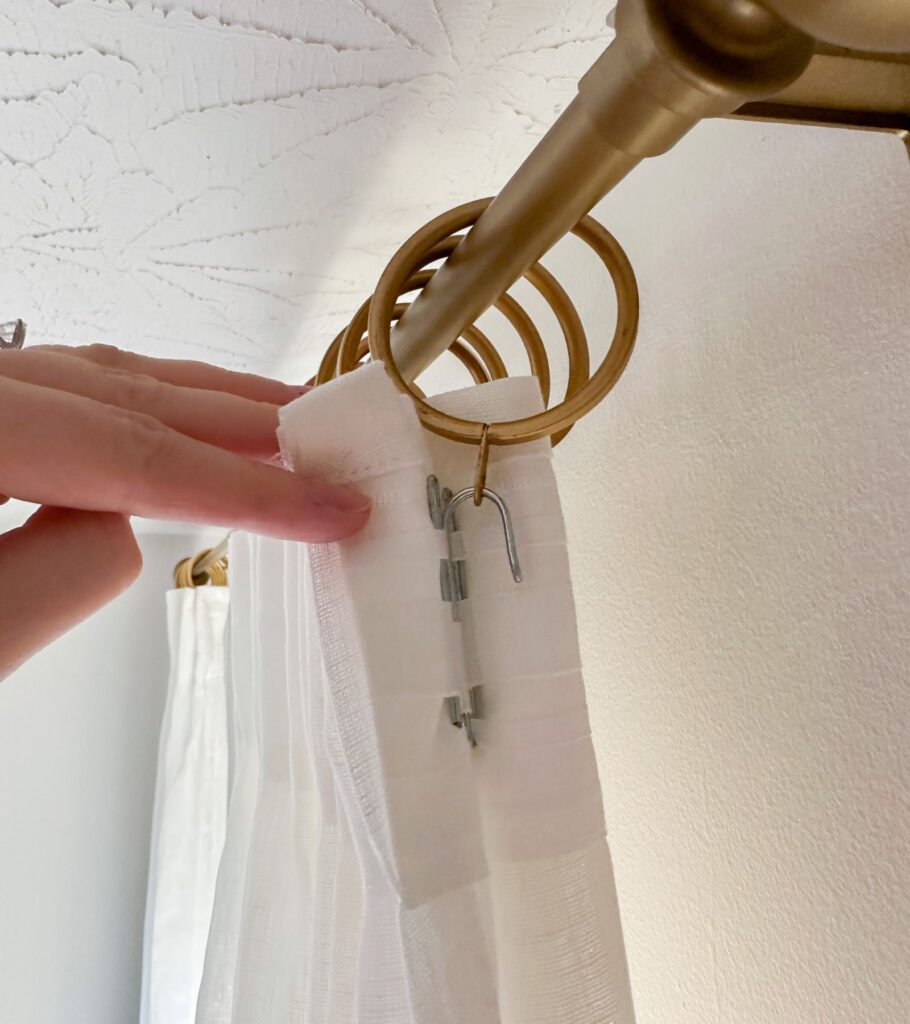
The curtains have heading tape on the back, which allows you to use IKEA RIGTAG curtain hooks to create pleats. It’s so easy to do, it only took me about 10 minutes to make the pleats & get all of the hooks in!
In other good news, the RIGTAG curtain hooks are super cheap, which makes the idea of pleating that much better.
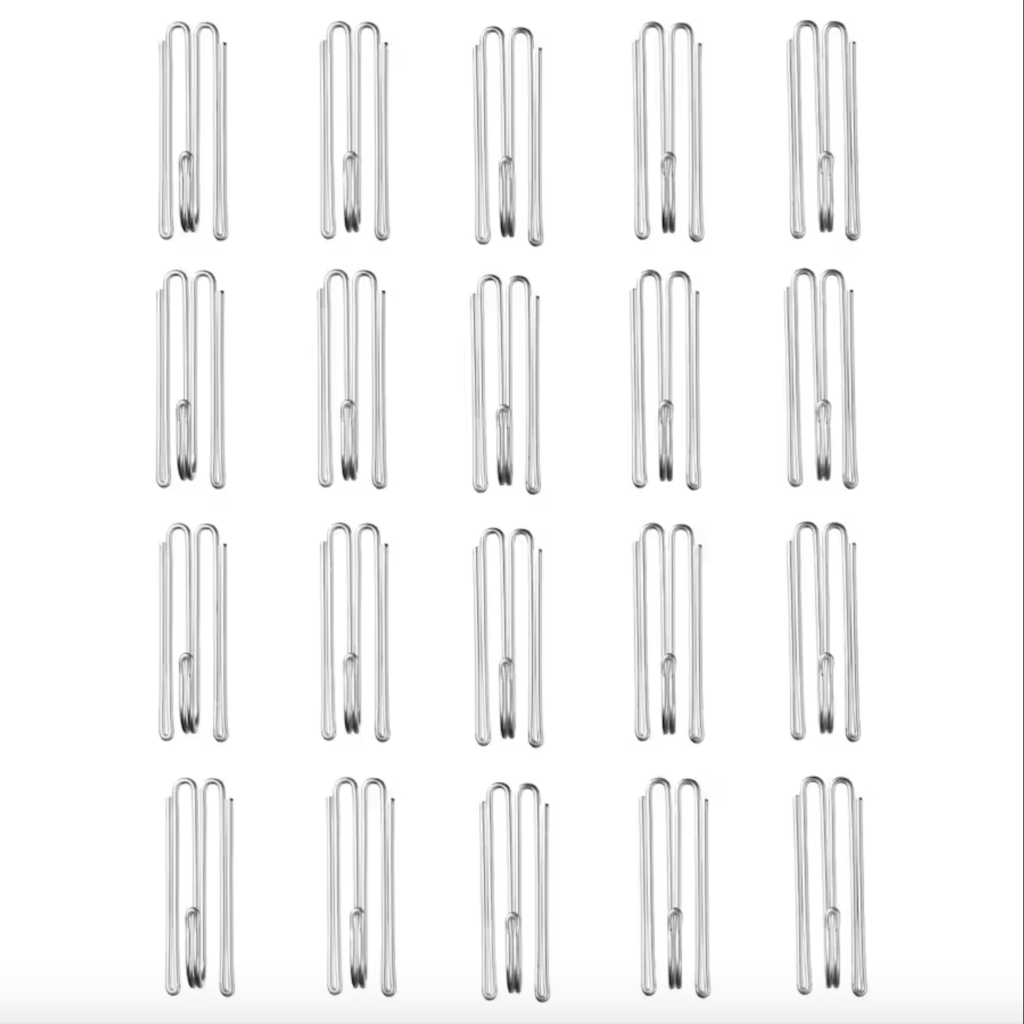
Pleats elevate the look of curtains, making them look completely customized.
If you really want your IKEA curtains to look expensive, you should absolutely pleat them!
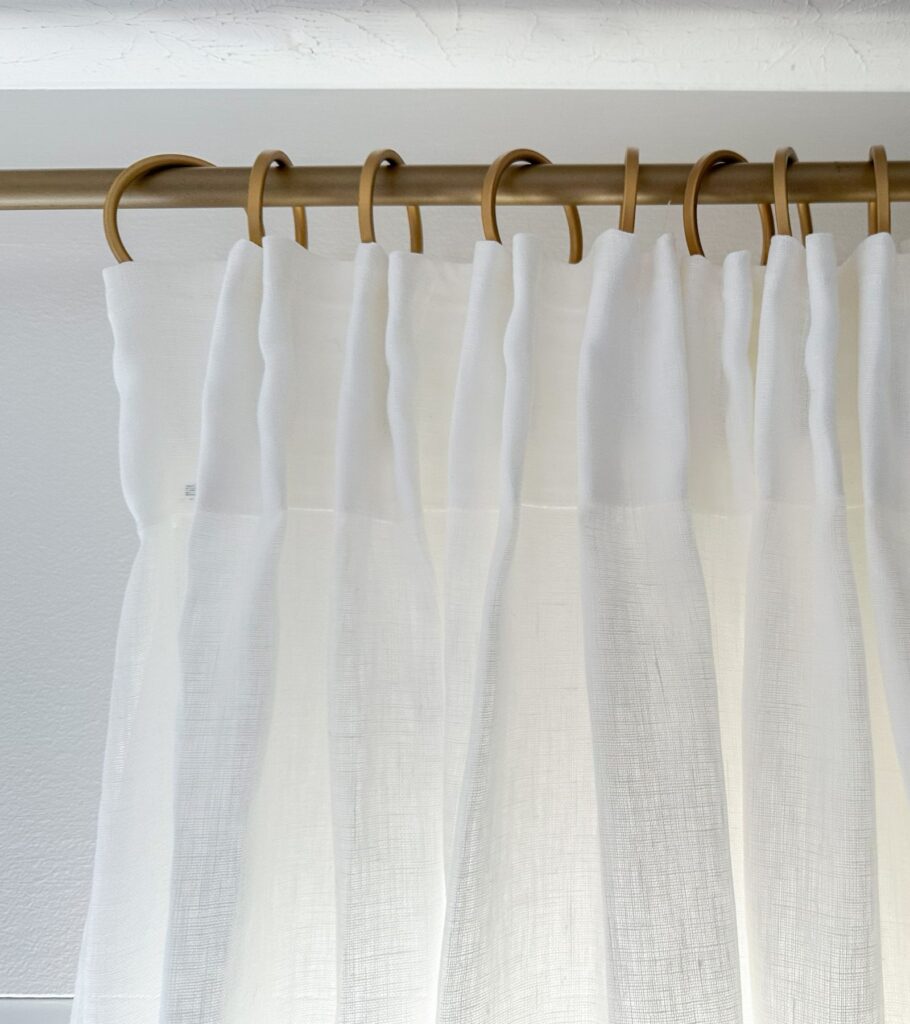
Curtain Rod
You could have the nicest-looking curtains out there, but a bad curtain rod will immediately bring down your look.
Stick with something simple. The finials on the ends of the rod should not draw all of the attention. Whether it’s a round knob, or something even more basic, these types of curtain rods tend to help make your curtains look expensive.
If your curtain rod has finials that have a lot of texture, enough to draw a lot of attention, then this may come off as ornate or “heavy”.
You don’t want your curtains to feel heavy or weigh down the room at all, so sticking with a basic curtain rod will be the best way to make your curtains feel elegant.
Curtain rod thickness is something else you should think about when purchasing a curtain rod. Thick curtain rods are going to look bulky and take up a lot of wall space. Slimmer curtain rods look sleek and keep the attention on the curtains.
Color
Brass is back baby! Color is another important piece of the puzzle when it comes to choosing a curtain rod. And nothing says fancy quite like gold does! Brass perfectly accents the linen color, and will greatly enhance the look of your curtains. It also depends on the rest of your room.
If you have black accents in your room, mixing metals and throwing in a pop of gold would look great! Black is another color that is bold and stylish, giving you a nice clean modern vibe to your room.
I highly suggest sticking with gold and black since these colors are very trendy right now, and bronze and nickel aren’t quite as popular as they once were. And if you really want to play it safe, black is classic and will never NOT look good!
Curtain Rod Placement
Hang your curtain rod brackets 6-12 inches from the sides of the windows (not including the finials).
Use the higher end of the range to make your window look even bigger and wider. You’ll also be able to push your full curtain to the side of the window as well. I went with 6 inches on either side for this window because the rod wasn’t quite long enough, but I think it still turned out amazing!
Check out my other post for a complete guide on curtain rod height, and other placement tips!
Curtain Rings
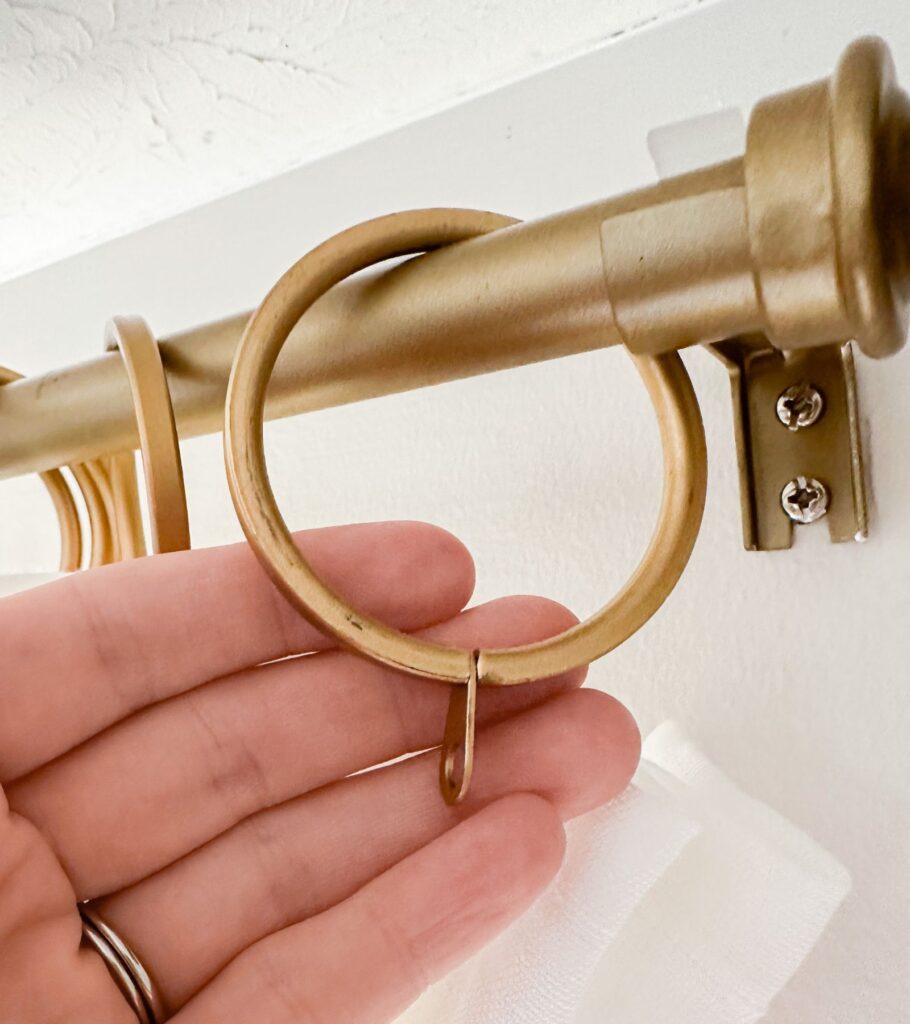
Curtain rings are a cheap way to make your curtains look expensive!
In my opinion, grommet curtains remind me too much of shower curtains so it’s hard to unsee it on a window curtain. Curtain rings add style, and keep the room feeling modern! This is what I tend to gravitate towards. There are different styles and colors that you can choose that best suit your curtain. For example, in my primary bedroom, I use curtain rings with clips. They simply clip onto the top of the curtain – easy as that!
Then there are curtain rings with eyelets that allow the IKEA RIGTAG curtain hooks to loop through such as the ones in my office. These are the exact ones I have:
Wrinkle-Free Curtains
While thinking about how to make curtains look expensive, something that probably doesn’t come to mind is a curtain full of wrinkles!
You can use a portable steamer to get your curtain looking nice and smooth. Now this may take a little bit of time, and you can also resort to an iron – you just have to be very careful that you don’t accidentally burn your curtains!
These little portable steamers are not only great for wrinkle-free clothes on vacation, but back at the house for getting those wrinkles out of curtains, bed skirts, etc. I have used both the steamer method and the iron method on curtains.
The steamer takes a little bit longer, but the positive is that you don’t have to take your curtains down and hang them back up. You can easily work with them while they’re hanging!
Curtain Length
Be intentional with your curtain length. I have an entire post dedicated to curtain length called Should Curtains Touch the Floor. It will go into full detail about the five different curtain lengths, including sill, floating, grazing, breaking, and puddling curtains.
The key here is to make sure your curtains aren’t drowning – yes I just made that up. 😏 But it’s the length after puddling you do not want. It’s when your curtains are way too long and it negatively impacts the room. My favorite curtain length is grazing, which sits about a ¼ of an inch off the floor, and barely grazes it – hence the name.
So definitely head over to my post all about curtain length for more details there!
Hang your curtains/curtain rod high to achieve an elegant look that shows off the full length of your curtains. I have 8-foot ceilings throughout my whole house, and I typically install the curtain rod 2-3 inches from the ceiling. It helps make the window feel taller and truly helps elevate your room!
Be sure to get the perfect curtain rod placement!

And that’s all there is to how to make curtains look expensive! This IKEA curtain hack will surely take your space to the next level! 🙂
Other Posts You Might Like:
Thank you so much very helpful …
Love the cost effectiveness. Love from sunny Florida ❤️☀️