The below post may contain affiliate links. This means we will receive a commission if you purchase through our link, with no extra cost to you. As an Amazon Associate we earn from qualifying purchases. Read our full disclaimer.

When you first think about turning an entire blank wall into a wall full of beautiful cabinets, shelving, or bookcases, it can seem a little daunting. Well, I’m here to tell you the good news – there’s a place called IKEA that exists 😉, and their products help make the job A LOT easier.
Their bookshelves and cabinets have a lot of potential to look designer-worthy and custom-built.
The best part? This DIY IKEA cabinet hack will dramatically cut your costs down when compared to having custom cabinetry installed.
For this IKEA hack, we used the Havsta cabinet collection from IKEA. In this post, we will be covering the following.
Table of contents:
Click on any of the below to jump to the section.
- Design The Built-In
- Purchase The Cabinets And Materials
- Build The Cabinets
- Remove Baseboards
- Dry Fit The Cabinets
- Level The Cabinets
- Find The Studs In The Wall
- Install The Base Cabinets
- Install Countertops
- Install The Upper Cabinets
- Hang Paintable Wallpaper On The Backing Of Upper Cabinets
- Fill In The Gaps Between The Cabinets And Wall
- Extend The Cabinets To The Ceiling
- Install Backsplash
- Add Trim Between Cabinet and Box
- Add Crown Molding
- Use Wood Filler Over Any Screw Holes or Shelf Holes
- Drill Holes For New Cabinet Hardware
- Sand All Cabinets, Doors, and Shelves
- Prime All Cabinets, Doors, and Shelves
- Caulk Everything!
- Paint All Cabinets, Doors, and Shelves
- Seal All Cabinets and Doors with Polycrylic
- Attach All Doors, Hardware, And Shelves
- Enjoy Your DIY IKEA Built-In Hack!
- Why did we choose IKEA Havsta Cabinets?
- Full List Of Materials And Supplies Needed

Our built-in cabinet wall is in our dining room which immediately greets guests upon entering our home. Based on everyone’s reactions, it’s a jaw-dropper (even I get taken back each time I’m walking past the room). I love, love, LOVE the way it turned out! I’ll go as far as saying I’m obsessed.
Let’s get into the good stuff – here’s how we made our DIY built-in for our dining room, and how you can too!
How To Make A DIY Built-In With IKEA Havsta Cabinets
I’m going to be honest – I want you to know that planning and building a DIY built-in for any space is a marathon, not a sprint.
There’s a lot of work that goes into it, so plan to carve out several weeks for this kind of project. With that being said, it is SOOO insanely worth it in the end, and even if ours took double the time that it did, I’d do it all over again to get this result!

1. Design The Built-In
This step is so important because you need to have a plan prior to even buying cabinets.
In this step, use a tape measure to measure your space for the width, depth, and height of where you want to install your built-in.

Be realistic – can these cabinets fit without cramming the room? When opening the cabinet doors, will they hit any other furniture? These are key questions to be thinking about when in the planning phase!
After measuring a million and a half times with every measurement that IKEA has to offer, we knew 100% that when the cabinets were installed, we would have no issues whatsoever.
The cabinet doors would clear our dining table when opened, and we would only have about 2.5 inches of space on either side of the cabinets that we would need to fill in. We knew all of this before purchasing the cabinets because we made sure our measurements were super precise.
Measuring is one of the most, if not THE most, important aspects of this project. Use all the information and measurements a product page provides to your advantage!
How To Design Your DIY Built-Ins
I use the free online tool called Canva – there’s a little bit of a learning curve but once you get the hang of it, you can essentially plan and design entire rooms. I do this prior to each of our home projects to get an almost exact visual of the final product.

You can also just sketch it out on a piece of paper and include all of your measurements.
2. Purchase The Cabinets And Materials
Once you have your plan buttoned up, it’s time to buy your cabinets!
As mentioned previously, we knew we needed:
- Two of the IKEA Havsta bases for the middle of the built-in
- Two of the IKEA Havsta storage combinations with glass doors for the outsides of the built-in (which includes the upper and the base cabinets)
We bought the white version.

We had these delivered because we don’t have an IKEA that’s super close to us. IKEA does have a delivery fee, but in this case, completely worth it!
We went to Lowe’s and purchased all of the other materials for aspects of the project like filling the gaps between the cabinet and walls, trimming, any wooden boards, etc.
Keep in mind: when you do a project of this size, it’s almost guaranteed that you’ll need to make several trips to Lowe’s or Home Depot for little things like extra screws, extra trim, etc. There’s no way to get it all on the first time so don’t stress too much to get it in one go. If you do – I’m giving you a standing ovation! 😊👏🏻
3. Build The Cabinets
Once your IKEA Havsta cabinets are delivered, build them!
Clear out the room you’ll be working in to give yourself plenty of space. The reason I say to build them right away is so that you don’t lose track of any of the pieces (they come with a lot), and this way you have the cabinets ready to go when the time comes.
It’s IKEA, so just prepare for about 30ish minutes per cabinet. After our first one, we started to pick up the pace and became pros at building Havsta cabinets! We could probably build them blindfolded at this point. The more IKEA hacks you do, the more familiar you’ll get with all things IKEA.
You will need a screwdriver and possibly a hammer for some stubborn pieces.

This is the part of the project that my husband bought knee pads from Amazon halfway through lol. Not a bad idea considering you’ll be scooting around on the floor a lot in the process of building, and for the remainder of the project. I do steal these for myself from time to time. 😏
Important: do not install the doors on any of the cabinets yet (base or upper glass doors). You’re going to be sanding, priming, painting, and sealing prior to putting the doors on. Plus the doors just get in the way during installation!

We made the mistake of installing all of the doors right away. It was a process of getting them detached and we ruined some screws along the way. *Chalks up another trip to Lowe’s*
4. Remove Baseboards
The next thing we did was remove the baseboards. In our space, we have a baseboard and a quarter-round to finish off the flooring.
Both had to be removed on the wall where the DIY built-in was going because we wanted the built-in to be as flush against the wall as possible. If you don’t, then your cabinet could stick out an extra couple of inches – we personally didn’t have the space for that!
First, we used a utility knife to score along the top of the baseboard where it meets the wall to break up the caulk. Then we used a flathead screwdriver (you should really use a pry bar) to drive between the wall and baseboard. The baseboard is nailed into the wall with a nail gun, so when you’re prying back the baseboard, that’s what you’re trying to loosen up.


Just go slowly down the length of the baseboard so you don’t break it! That’s some perfectly good baseboard you could use elsewhere.
Once your baseboard is off the wall, use a hammer to bend down the nails on the board so you don’t accidentally step on one – not fun – or you can use pliers to remove them completely.
5. Dry Fit The Cabinets
Once our baseboard and quarter-round were removed, we slid all of the cabinets into place to ensure we had a good fit.

We had one outlet along the wall where our DIY built-in cabinets were going. We measured and marked with a pencil where it lined up on the particular cabinet that would be covering it, and used an oscillating tool to cut a hole in the backing of the cabinet.
You can also use a drywall knife which is a lot cheaper!
When installing a DIY built-in, it’s very important that you DO NOT cover any outlets or switches. This is completely against code – your outlet/switches need to be accessible.
So this will satisfy that requirement! Again, we are not certified electricians, so be sure to connect with your local electrician for recommendations or help with this.
We then made sure our cabinets were centered on the wall so that there was the same amount of space between the walls on either side. This will help with the next couple of steps.
6. Level The Cabinets
Leveling cabinets is necessary for a nice even look, but also so that you can install countertops (which I definitely recommend 😉) without having any issues.
We grabbed our 24-inch level and made sure that each cabinet was level from side to side. Then we made sure the front to back was level.

It may take a little bit to get the adjustments just right. This will also help if you have multiple cabinets in a row like we do, to ensure it looks like one cohesive piece!
IKEA Havsta cabinets come with little screw-in feet specifically for leveling the cabinet. All you have to do is screw them in or out to raise and lower the cabinet accordingly.
Attach Extra Supports To The Cabinets
Almost all IKEA furniture comes with mounting hardware so that you can safely secure it to the wall. However, the Havsta bases have specific holes in their backing for you to screw through into the wall.
The thing I don’t like about this is the backing to the cabinets is flimsy fiberboard and not something I personally would rely on to safely hold my cabinets in place.
In my case, the cabinets would be held down by heavy countertops so the likelihood of them ever falling is extremely low. My inner safety police came out lol, so even though the chance was low, I wanted to make it even lower – nearly impossible.
We cut and attached 1×6-inch wooden boards from Lowe’s to the back of each base cabinet. To cut, we used a circular saw (but you can also use a hand saw). For attaching, my nail gun was not cooperating during this step. I had some assorted brad nails and used two 1 and ¼-inch brad nails from this pack on either side to secure the board to the cabinet.

Although this was probably overkill, it immediately increased my faith in the safety of the cabinet being secured to the wall! And my inner safety police was satisfied with the work haha.
Before we permanently attached anything to the wall, it was extremely important to make sure the cabinets were straight across, and they were completely centered even after leveling. Since we had to shift some cabinets around, we triple-checked our work before moving on.
7. Find The Studs In The Wall
Next, we used a stud finder right over the base cabinets and marked where the studs were with a pencil on the wall.
We used a stud finder very similar to this one, and the reason I recommend it is because it shows you where the edge and center of the studs are for accuracy. It has come to the rescue in just about every home project that we’ve done, but especially for this DIY dining room built-in.

Once the studs were marked on the wall, we made a mark on the inside of the cabinets so we knew where to make our pilot holes for anchoring the cabinets to the wall.

It’s important to drill into studs for maximum strength when securing cabinets to the wall. We were able to drill into two studs per cabinet. Based on the average width between studs, you should be able to as well.
If for any reason you can’t hit a stud, definitely use heavy-duty drywall anchors for securing anything to the wall.
8. Install The Base Cabinets
Important: if you are planning to have countertops installed and are following a similar design, only install the base cabinets first and not the upper cabinets with glass doors.
Attach The Cabinets To Each Other
To pull the cabinets as close to each other as I possibly could, and truly make it one cohesive piece, I screwed each cabinet into its neighboring cabinet. This helps eliminate gaps but also makes sure that the cabinets won’t ever shift around and get out of alignment.

It’s so important to make sure the cabinets are all in line with each other as best as you can because once attached to the wall, that’s where they’re going to live! I cannot stress that enough.
We used #10 1 and ¼-inch wood screws to ensure that they wouldn’t go through the other cabinet – that would not look good!
Want those screws to be hidden? We used this awesome countersink drill bit (specifically the #10 option for our #10 wood screws). Essentially, it’s like a regular drill bit, but it creates a little bit of a crater so that the head of the screw sinks into the wood as opposed to sitting on top of it. Then you can use wood filler to cover and no one will ever know it’s there – giving you that ultimate finished built-in look.

Just make sure the countersink bit is adjusted so that the bit doesn’t go through the other cabinet. Then we used our drill to drill in the screws!

This tool is amazing for any time you’re trying to hide your screws!
DIY built-in? No way – we’re making this look as custom-made as we can get!
Attach The Cabinets To The Wall
With our extra support installed and our studs marked from the previous step, we got out our #10 2 and ½-inch wood screws. We used our regular drill bits and drilled pilot holes through the backs of the cabinets, through the newly installed wooden supports, and into the studs. And then drove those long wood screws right on through!
Thanks to the hundreds of pounds of countertop, extra supports, and long screws into studs, these cabinets aren’t going ANYWHERE haha.

9. Install Countertops
Once our base cabinets were completely installed, we had our quartzite countertops installed!

We actually went countertop shopping a month or so before the project began, so we had already picked something out that we loved.
I picked this particular quartzite out because it was neutral enough to go with any color the cabinets or the room would ever be, but the veins in it are truly stunning!
The specific quartzite is called Bianco Superiore.
For even smaller projects, you can find remnant pieces at local stone yards which are typically a lot cheaper than dealing with an entire slab.
This was the only part of the project where we got to kick back and relax while the countertops were being installed, so we soaked it in while we could!
10. Install The Upper Cabinets
With the countertops installed, the DIY built-in cabinets in this dining room were really starting to come to life. It was time to get the upper cabinets with glass doors installed.
Although my inner safety police made a guest appearance on the base cabinets, we found a different method of attaching the upper cabinets to the wall (which already made me feel a lot better than the bases).
We had strong steel L brackets left over from another project, so I was able to secure two into the top of each cabinet, both going into studs. The steel brackets were strong enough to make us feel good about it never toppling over.

Although we didn’t install wooden supports in the back of the upper cabinets, we drove two screws near the bottom of the backing into studs. As I mentioned, the backing is flimsy, but this just made sure the bottom of the cabinet couldn’t be pulled away from the wall.
My husband just loves doing the “pull” test, which I’m not a fan of because if it isn’t broken don’t break it…right? But even with pulling full force on these cabinets, they were not budging – not even a little bit!
I’m pretty sure tall IKEA furniture like bookcases and cabinets typically come with some type of mounting hardware. But since we had other ways of securing to the wall, we went the bracket route. You can get inexpensive, strong steel brackets off Amazon that will be strong enough for this job!
11. Hang Paintable Wallpaper On The Backing Of Upper Cabinets
Once the upper cabinets were installed, I immediately hung my paintable wallpaper to the backing.

The paintable wallpaper is another one of those elements that enhance the IKEA cabinets and make them look even more custom. It adds some excitement to a rather simple cabinet.
This wallpaper was super easy to install – it’s water-activated so all you have to do is dunk it in water and press it into place. I highly recommend this product!

Plus, it’s paintable, hence the name! So when it comes to the step where we start painting, you can paint right over it with your favorite color.
This was installed right over the screws in the backing of the cabinet – you can’t even tell that the screws are there!
RELATED POST: Peel And Stick vs Traditional Wallpaper – Best Type of Wallpaper For Your Home
12. Fill In The Gaps Between The Cabinets And Wall
This step is what gives your cabinets that true built-in look. Your guests will never know that there wasn’t a built-in there before.
This is also the first step that we had our “uh-oh” moment…eek. More on that in a minute!
As mentioned earlier, four of these Havsta IKEA cabinets fit nearly perfectly between our walls, or about as perfectly as possible without being custom-made cabinets.

Chances are, you’re going to have some gap between the sides of your outermost cabinets and the wall. For us, it was about two and a half inches worth of a gap on either side.
Hey not bad for a DIY built-in! 😊
To fill the gap, we started by attaching small pieces of 2×4 wooden boards to the sides of the cabinet – both on the base cabinets and the upper cabinets. We used #10 1 and ¼-inch wood screws for this.
We had to drill pilot holes through the Havsta cabinets, into the wooden board we were holding with our hand, and line it up perfectly.


We used a piece of cabinet paneling that would be laying over these boards and needed to look completely flush with the IKEA cabinets. In other words, this part was a little tedious.
We cut a small sliver of the cabinet paneling to hold in front of each board while we drilled our pilot holes. Then we would remove the piece of cabinet paneling and finally attach the boards to the cabinet with screws.
Looking back, it probably would’ve been easiest to just cut a 2×4 to the entire height of each cabinet, instead of smaller pieces of wood. I think we made it more difficult on ourselves, but regardless, it still turned out perfectly!
How We Cut The Cabinet Paneling
We then cut the cabinet paneling to the exact measurements we needed using a jigsaw – also tedious. Finally, we attached the paneling to the front of the 2x4s with our nail gun.

Something good to know is that if you do not own a nail gun, you can rent one from Home Depot for days at a time, and for a relatively cheap price!
Uh-Oh Moment
There always has to be one!
So circling back to the moment we thought we messed it all up. We forgot about the baseboards to the sides of the DIY built-in…you know, in the two-and-a-half-inch gaps on either side? Not that this was the end of the world, but definitely far from ideal.
In an ideal scenario, we would have cut these baseboards prior to installing the base cabinets. And look at that, we’re 3 steps from that now lol.
Another option was to cut the cabinet paneling precisely in the shape of the baseboard so it fits like a puzzle piece – but this would be a lot of work to get it perfect.
So we used our oscillating tool, put it as close to the cabinets as possible, and cut right through the baseboard. Once cut, we still had to pry the remaining baseboard from the wall. Luckily my husband has long arms and was able to reach to the back wall. Crisis averted – phew!
We then ordered an extra IKEA Havsta base (not a base cabinet, but the base the cabinet sits on). All for only five inches to be used. But we used these pieces to make it look like there was one cabinet baseboard stretching from wall to wall. The intricate little cuts on these tiny pieces definitely paid off.

Gap Between Floor and Bottom of Cabinets
Unrelated, we noticed a small gap between the floor and the bottom of the cabinets. Hmm… We looked behind us and there was the quarter-round piece we pried up from early haha! It was already the perfect length – we just had to make some small angled cuts on the neighboring quarter-rounds.
Surprisingly the quarter-round was the single most helpful piece in making the DIY built-in look like it came with the house. Who would’ve thought?
You will probably have a similar gap – so if you don’t already have a quarter-round, just buy one that’s primed and then paint it the color of your cabinets when we get to that step!
13. Extend The Cabinets To The Ceiling
I get asked the question, “How to extend cabinets to the ceiling?” so often. Here’s how I did it for this IKEA hack!
We used a 1×12 wooden board which got us super close to the ceiling. Like within 2 inches close.
We essentially created a box on top of the cabinets. The back and side of the box were attached first with a nail gun and two steel brackets.


Why didn’t we just build the entire box on the ground? Because we needed to attach the back of the box to the studs to ensure that this thing was never coming down. I know, so safety police of me! We then attached the front of the box and the remaining side to each other. That was then attached to the rest of the already installed box with a nail gun.
For even more security (as if we didn’t already have enough in place), we used our nail gun to drive a couple of nails from underneath the top of the cabinet, into the bottom of the box. We did this just for the front of the box.
This part took a lot of patience and some serious thought because the box had to line up perfectly with the outside of the IKEA Havsta cabinet so that in the end, the box and cabinet would look like one piece. So we had to get this part absolutely perfect!
We used a level between the box and cabinet before attaching anything to make sure the parts of the box were lined up exactly with the cabinet.
We pulled on the box once all was said and done (yes the beloved husband pull test haha), and that thing did not budge!
14. Install Backsplash
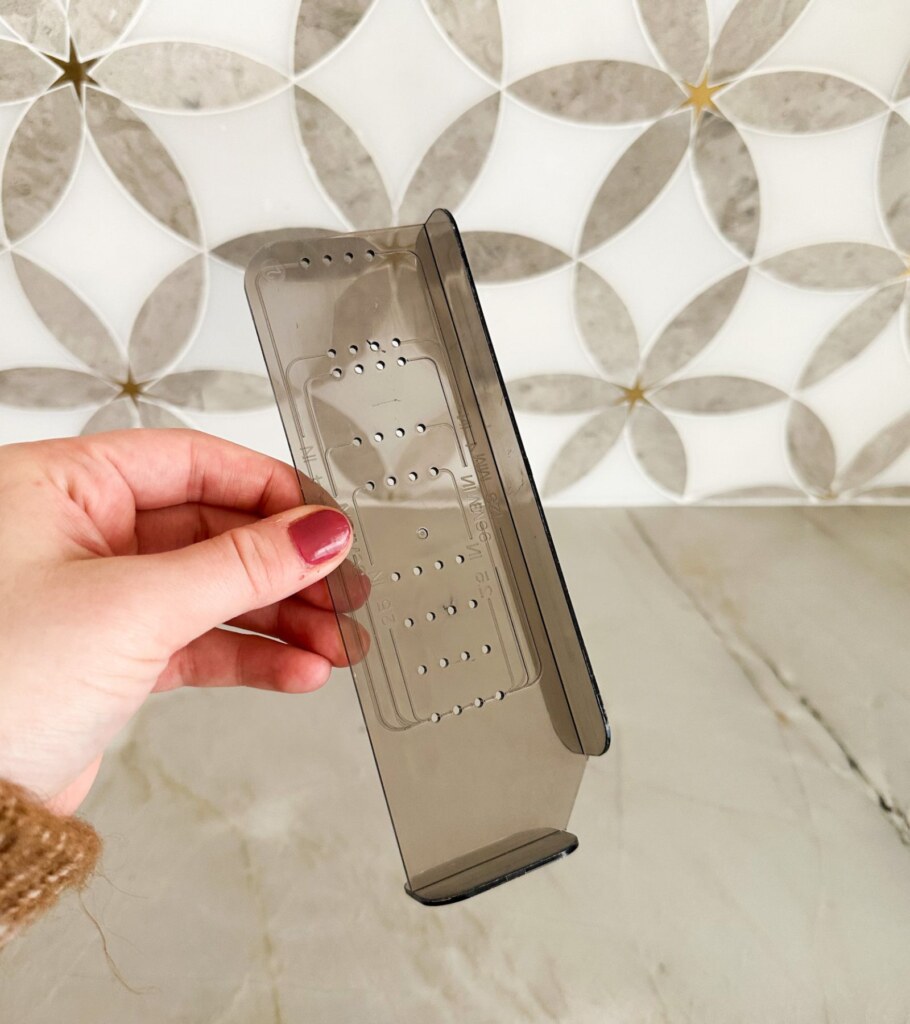
The tile is called the Cressida II Royal White And Brass Waterjet Marble Mosaic from Floor & Decor.
RELATED POST: Backsplash for Beginners: How to Install Tile Backsplash Easily
We installed the backsplash ourselves
After having experience with our kitchen backsplash and also the flooring in our organic modern bathroom, it was time for us to take on another backsplash project.
Every time we need to cut tile, we rent a wet saw from Home Depot for the day and cut all of the pieces all at once. It’s actually very affordable to do it this way.

This tile was easily the most difficult to cut that we’ve worked with, because the pieces are not a perfect square, and it has those adorable little gold stars. Well, those adorable stars become a lot less adorable at the moment when you have to cut precise lines right through them haha.
Just kidding, they are still my favorite part of the backsplash! 😊
So after the thin-set, cutting, placing the tiles, grouting, and cleaning, the backsplash was finally up and all I could say was wow…I was immediately obsessed and got so much motivation to finish this project!

When you walk by the room, the gold stars will catch the light and glisten. The only word to describe it is “stunning” and I’ve never been happier with a tile!
I then bought caulk from the same brand and color as the grout, and caulked along the perimeter of the backsplash to completely finish it off! The brand/color of the caulk and grout is Mapei Avalanche.

RELATED POST: Backsplash for Beginners: How to Install Tile Backsplash Easily
15. Add Trim Between Cabinet and Box
As you can see, there was now a visible gap between the top of the IKEA Havsta cabinet and the box we just created to extend the cabinet to the ceiling.

We found a tiny half-round piece of trim in the molding/trim aisle at Lowe’s. Literally just big enough to cover the gap. Honestly, we were cutting it pretty close, but it ended up covering the gap which is all that matters.
We used a miter box and saw to cut a 45-degree angle for the front trim and side trim to meet perfectly together.
We simply used our nail gun to attach it to the cabinet and box. Simple as that!
16. Add Crown Molding
This part was really tricky because ideally, you would have an actual miter saw to perfectly cut angles in crown molding. Out of all of the tools we own and projects we have completed, we have somehow gotten this far without a miter saw.
They’re expensive and just not something we need frequently enough to buy one just yet.
So how did we cut the angles? With our miter box and saw. And each person who has seen this has asked how we got the angles so perfect with just a miter box.

It was A LOT of patience and another trip to Lowe’s (if you’re keeping a tally) for another piece of trim due to a mistake lol.
I ended up going with this specific crown molding because I loved the design.
Since the crown molding draws attention to itself, you need to get that corner lined up perfectly. After watching a few YouTube videos on how to cut crown molding with a miter box, we were able to get the angle cut just right. This is the exact YouTube video we watched that ultimately helped us so much. It’s from 2010 and kind of blurry but it was the advice we needed to get the job done!
The crown molding was attached to the top of the box and to the ceiling with a nail gun.

As you can see, these covered the small inch gap between the top of the box and the ceiling, making it look like one cohesive piece.
At this point, we were getting so excited because you could really see the DIY built-in looking more and more like a built-in!
17. Use Wood Filler Over Any Screw Holes or Shelf Holes
Remember how we used that countersink drill bit so that our screws could sink down into the wood? Well, now we’re going to fill over the screw holes with wood filler.
In the end, you won’t even see the screws we used to connect the cabinets to each other, or the screws for the boards we used to fill the side gaps.
We also used wood filler to cover the shelf holes that we weren’t using. You’ll notice IKEA furniture has a bunch of holes for your shelves so that you can adjust your shelves to your desired height and distance between each shelf.

Once we determined exactly where we wanted our shelves, there was no need to have the option to move the shelves again. So we covered all of the exposed shelf holes with wood filler.
You can simply use a small putty knife or even your fingers to apply the wood filler.
Ensure the wood filler has completely dried before sanding it down. We’ll sand everything soon!
18. Drill Holes For New Cabinet Hardware
If you’re looking to install larger cabinet pulls that require two screws as opposed to keeping the single knob look, you will need to drill at least one new hole.
We actually utilized the hole that was already on the doors and then used this hardware installation template we randomly found hanging in an aisle at Home Depot to perfectly align the new hole we would need. That was a lucky find that made our life easy!
It really worked out to our advantage, and we thought we might never use this tool – so I’m glad we got some use out of it!
With a drill bit, we made room for the new screws that came with the new hardware on each cabinet door. You would never know that the cabinets didn’t come like this!
Btw, I want to take a moment to obsess some more over these cabinet pulls I found for my DIY built-in off Amazon. I mean between the color and design…stunning! I went with the 5” option. Seriously couldn’t be happier that I found these. Everyone asks me about them because they catch so much attention! Definitely a must-have for your built-in!
New cabinet hardware is something that will also help enhance the look of your IKEA cabinets, and take them to the next level. New, expensive-looking pulls will make your cabinets look even more custom!

We didn’t install the new hardware just yet because of the next step – which was hard to wait on! But we definitely tested on multiple doors just in case any adjustments needed to be made.
19. Sand All Cabinets, Doors, and Shelves
Once the crown molding was up, we were really getting close to the final product, but it was time to begin the road to painting.
RELATED POST: Painting IKEA Cabinets Like a Pro
With IKEA furniture, it already comes with a clear acrylic top coat to protect. Well, little did IKEA know how much their products would be used for DIY hacks, so we had no choice but to sand down that coat of protection.
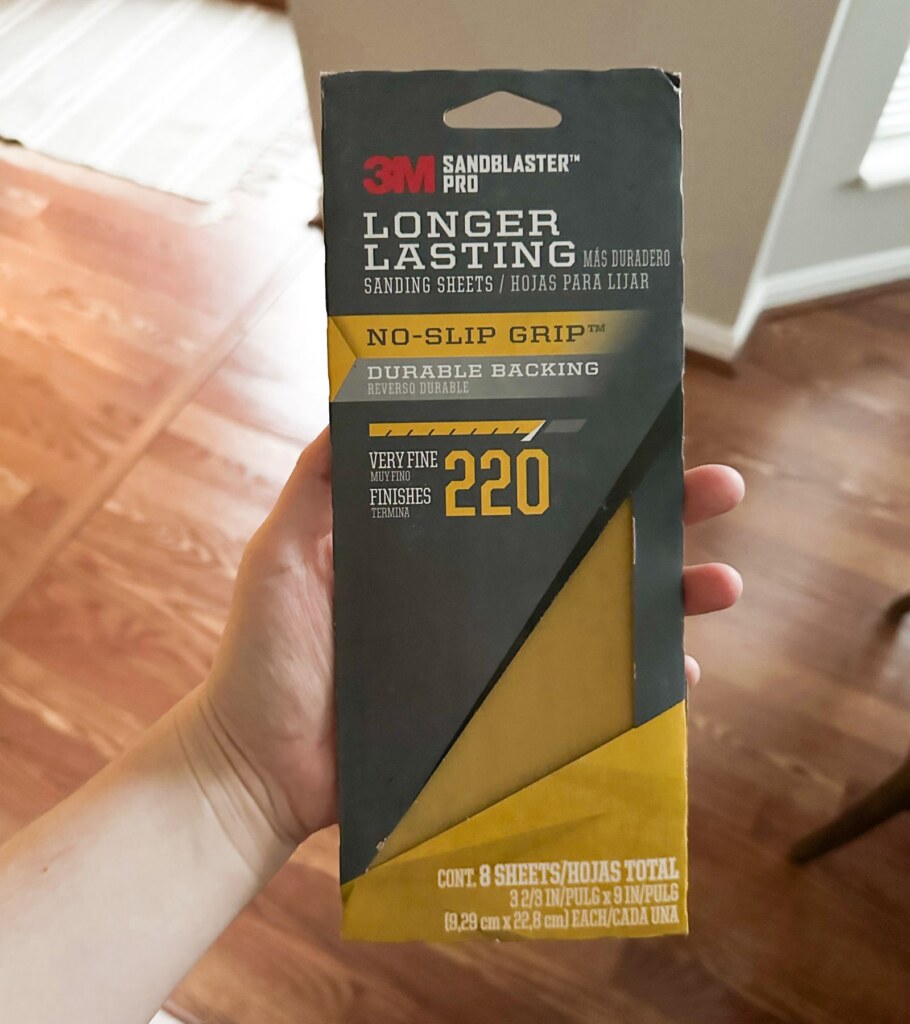
You only need to lightly sand down all surfaces with 120-grit sandpaper. If you start to see the white paint disappearing and see a natural wood color begin to show, you’re sanding too hard!
Sanding is never a super fun process, but it’s essential if you want your paint to look good for years to come.
I personally did not sand down the insides of my base cabinets, because I didn’t paint in there. There’s really no need to paint the interior of cabinets that will never be seen, so that was left alone for the remainder of the project.
I sanded the insides of the upper cabinets and the shelves because you can see through the glass doors, and I wanted them all painted.
Once everything was sanded down, I got a bunch of damp paper towels (you can also use damp microfiber towels) and wiped all of the sanding dust off.
I highly recommend sanding all doors over a tarp, that way you can easily take the tarp elsewhere and shake it off. There was A LOT of sanding dust – there’s a lot of surface to sand! Just make sure to use a different tarp when it comes time for painting.
Vacuum the room before moving on. Let me reiterate – there’s a LOT of sanding dust lol.

I also sanded down the holes I filled with wood filler during this step!
20. Prime All Cabinets, Doors, and Shelves
Now that everything has been sanded down, I primed all cabinets, doors, and shelves.
I used Zinsser Bulls Eye 1-2-3 Primer – I’ve used this on our DIY IKEA entertainment center in our basement, and it worked perfectly. Simply just applied with a paintbrush!

Do I need to prime IKEA furniture before painting? You definitely want to prime IKEA furniture before painting it because it’ll help your paint adhere better. If you don’t prime your IKEA furniture, it might start peeling over time, and you definitely don’t want that!
So please prime this IKEA DIY built-in hack or any IKEA hack that requires painting!
If you want an even more extensive breakdown on painting & priming IKEA cabinets, this breakdown is SO helpful!
I only used one coat of primer on all surfaces. Between the sanding and the coat of primer, I felt pretty comfortable with this prep.
You can always do two coats of primer to be safe, but I don’t think it’s totally necessary if you sanded well enough.
21. Caulk Everything!
After the primer dries, it’s time to caulk everything.
Every single seam, gap, or anywhere else a board meets another board, I caulked it with DAP Alex Flex paintable caulk.

This took a long time to make sure we were covering all seams, but essentially this is what gives the DIY built-in its nice, finished look. After caulking, it will really look like one piece.
Just put a bead of caulk along the seam, dampen your finger with some water, and slowly slide it along the bead of caulk to smooth it out.

I use this caulk for all of my projects because it’s fast-drying, and it’s paintable. I’ve never had any issues with it and it always turns out SO good!
22. Paint All Cabinets, Doors, and Shelves
For the moment we’ve all been waiting for – PAINTING!
There have been several steps that completely transform your piece from looking like a bunch of IKEA Havsta cabinets to a DIY built-in, but this one will really seal the deal.
For a full breakdown on “how to paint IKEA furniture”, I’ve got you covered! This post goes more into how to paint IKEA furniture, which primer is best, and how to seal it so you have professional-looking cabinets!
RELATED POST: Painting IKEA Cabinets Like a Pro
We used Warm Putty (Satin) by Valspar on our Havsta cabinets, which is the same paint we used on the door in our laundry room and the half board and batten wall in our half bath. Needless to say, we LOVE this color haha.


It gives the cabinets a nice, warm taupe look. We took into consideration that the backsplash is mostly creamy white and gold, the chandelier in the room is gold, the pulls are brass, and the countertop is greyish.
I felt the homeyness of Warm Putty could really warm up the space while still giving off a neutral vibe.
I used two coats of Warm Putty on all cabinets, doors, and shelves.
It’s best to paint after caulking because you’ll want your caulk to also be the same color as the rest of the cabinets. Doing it in this order will cut down on any extra work!
23. Seal All Cabinets and Doors with Polycrylic
Last but not least, protect your cabinets and doors with a clear top coat called Polycrylic.
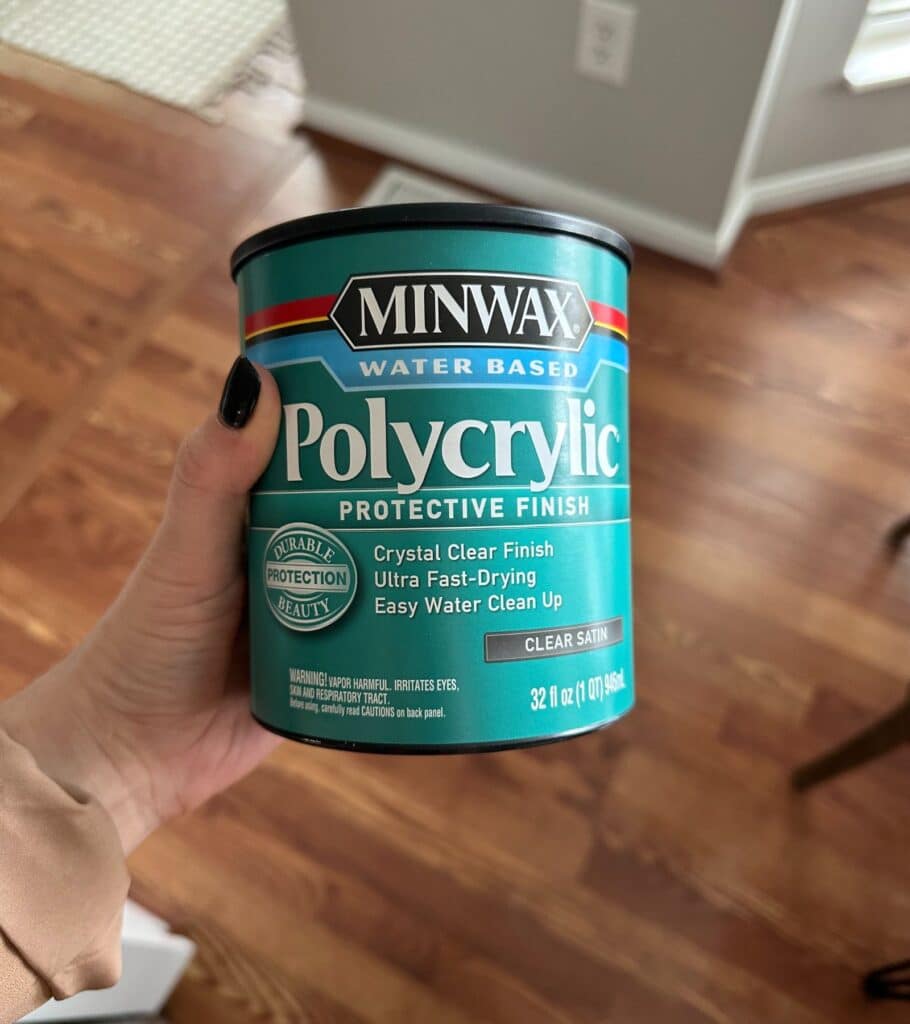
I literally use this stuff on all of my home projects. It’s such an easy top coat to work with, especially for DIYers, and I’ve never doubted its ability to protect my work! It dries sooo quickly, which is one of my favorite things about it.
Plus, since it’s water-based, it goes on super clear and won’t alter the color of your paint or wood.
I love it so much that I have a post dedicated to all of the great facts about it. Even though the post is about sealing butcher block, you will get a jam-packed info sesh on all things Polycrylic.
Polycrylic will ensure that your DIY IKEA built-in hack stays protected for as long as possible.
I used two coats of Polycrylic Clear Satin on all painted cabinets, doors, and shelves. I applied it using a sponge brush.
24. Attach All Doors, Hardware, And Shelves
This is the easy part (for the most part) with your DIY built-in.
IKEA cabinet doors have always proven to be a little tricky to attach for me. In the case of the Havsta, there are two very similar screws – one for attaching the hinges to the doors and one for attaching the hinges to the cabinets.
Be sure you are using the right ones or else when you go to attach the doors to the cabinets, you’re not going to be having the most fun time. I quickly found this out, so just a little heads up!
We then attached those new beautiful handles as well, which really makes the IKEA built-in pop.
And last but not least, we set all of our shelves into place for our upper cabinets.
25. Enjoy Your DIY IKEA Built-In Hack!
Creating a DIY built-in is a lot of work, but the reward is the everyday enjoyment you get out of it – which outweighs all of the labor and love you put into it!
I mean, this room used to be the plainest room in my home. It took me a long time to figure out what to do with it, but once we thought up the idea of making a DIY built-in with IKEA Havsta cabinets, I knew that’s exactly what the room needed.
Now my dining room is easily one of the most elevated rooms in my entire house. Any time we have dinner parties or friends over, we’ll have dinner in this room and our guests are always in awe of how amazing the built-in looks.

If you’re creating your own DIY built-in in your dining room, this is the time to take a step back, pat yourself on the back, and take in the beauty of everything that you’ve accomplished!
Why did we choose IKEA Havsta Cabinets?
There were several reasons why we ultimately chose the IKEA Havsta cabinets for our DIY dining room built-in.
Quality
Havsta cabinets are mostly real solid pine wood, while Billy bookcases are all particleboard.
That’s not to say you can’t have a stunning Billy bookcase built-in, because I’ve seen some extremely beautiful ones. But for our purposes, the Havsta was the move.
Design and Size
The Havsta cabinets have more of a “cabinet” look to them, while the Billy bookcases have more of a “bookcase” look to them. I guess that may be obvious from the name – but you can really tell when you look at the bases of both products.
The Havsta cabinets have a base that looks more kitchen-cabinety. Which is what we were going for in our dining room.
Also, the size of the Havsta cabinets was almost too good to be true. When we measured the width of our dining room, four cabinets fit nearly perfectly side by side. We were head over heels about it after all of the research we had put in!
Less work for us – woohoo! 😊 We just had about 2.5 inches of space to fill on either side.

The depth of the Havsta was also perfect. We’ve always had the vision of creating DIY built-in cabinets in our dining room, but the space is already relatively small. If we used actual kitchen cabinets, we simply wouldn’t have the space. The table would need to shift, the chandelier wouldn’t be centered, and someone would be eating up against the wall lol.
The Havsta is about 18 inches deep, which is deep enough to be functional but shallow enough to not stick out into the middle of the room.
Price
The price of the Havsta cabinets is unmatched when compared to custom cabinetry, and that’s before the cost of labor is factored in. 😳
Our DIY built-in project involved:
- Two Havsta base cabinets
- Two Havsta storage combinations with glass doors (which include the base cabinets and the upper cabinets with glass doors)
In total, it cost us right around $1,500 for all cabinets. For a wall of cabinets that now look like this, that is an unbelievably good price! Especially considering custom-built cabinets in this space would be over $10,000!!!
Full List Of Materials And Supplies Needed
Don’t be intimidated by this list of tools and supplies! This is literally every single thing that I used.
During the planning phase of your built-in project, think about the steps based on your design. We did things that you may do differently, which may require even fewer tools and materials.
Each design, and therefore the tools needed, are unique to each project! If you’re just starting out in the world of DIY, check out my post on the must-have tools for DIYers.
Here are the materials and tools listed in (mostly) the order that they appear:
- Two IKEA Havsta Base Cabinets
- Two IKEA Havsta Storage Combinations with Glass Doors
- One IKEA Base
- Tape Measure
- Screwdriver
- Hammer
- Utility Knife
- Pry Bar (you can also just use a flathead screwdriver)
- Oscillating Tool
- 24-inch Level
- Assorted Brad Nails (possibly)
- 1×6-inch Common Board
- Circular Saw or Hand Saw
- Stud Finder
- #10 1 and ¼-inch Wood Screws
- Countersink Drill Bits
- Drill and Drill Bits
- #10 2 and ½-inch Wood Screws
- L-Brackets For Upper Cabinets
- Paintable Wallpaper
- 2×4-inch Wood Boards
- Side Cabinet Paneling
- Nail Gun with Brad Nails (you can also rent one from Home Depot)
- Jigsaw
- 1×12-inch Wood Boards
- L Brackets For Box
- 9-inch Level
- Half-Round Trim Piece
- Miter Box and Saw
- Crown Molding
- Wood Filler
- Putty Knife
- Cabinet Hardware Installation Template
- 5” Cabinet Pulls
- 120-Grit Sandpaper
- DAP Alex Flex Caulk
- Caulk Gun
Priming, Painting, and Sealing
- Zinsser Bulls Eye 1-2-3 Primer
- Paint Supplies (Paintbrush, Paint Roller, Roller Covers, Paint Tray, and Liner)
- We used Warm Putty (Satin) by Valspar for our paint
- Polycrylic Clear Satin
- Sponge Brush
RELATED POST: Painting IKEA Cabinets Like a Pro
Backsplash
- Tiles (Cressida II Royal White And Brass Waterjet Marble Mosaic from Floor & Decor)
- MAPEI Ceramic Thinset
- MAPEI Unsanded Grout – Avalanche Color
- MAPEI Unsanded Caulk – Avalanche Color
- Grout Float
- 3/16″ V Notch Trowel
- Sponges
- Bucket
- Mixing Tool Drill Attachment
- We rented a wet saw from Home Depot for cutting the tiles
RELATED POST: Backsplash for Beginners: How to Install Tile Backsplash Easily
This post was about our DIY built-in dining room using the Havsta IKEA cabinets.
Now that’s a DIY IKEA built-in hack!
I hope this post helped inspire you to complete your own DIY built-in. As you can see from the before and after, a built-in can completely transform your space.
The great thing about a DIY built-in is that, compared to other home projects, it has a HUGE, and I mean massive, impact for a fraction of the cost. Plus, it’s completely customizable since you’re doing it yourself, so you can make it as inexpensive as you want!
Happy DIYing!


Leave a Reply